
There’s a reason the best Amish white bread remains a staple on farmhouse tables and in modern kitchens: it’s simple, supremely soft, lightly sweet, and perfect for everything from toast to towering sandwiches. This guide brings you a time-tested process, pro techniques, and a reliable step-by-step recipe so you can pull two golden loaves from the oven with confidence on your very first try.
If you bake often, water quality can noticeably affect flavor and yeast activity. For a reliable kitchen setup that keeps your dough consistent year-round, consider upgrading your home water solution with SmartWaterBox.
Table of Contents
What makes this loaf special
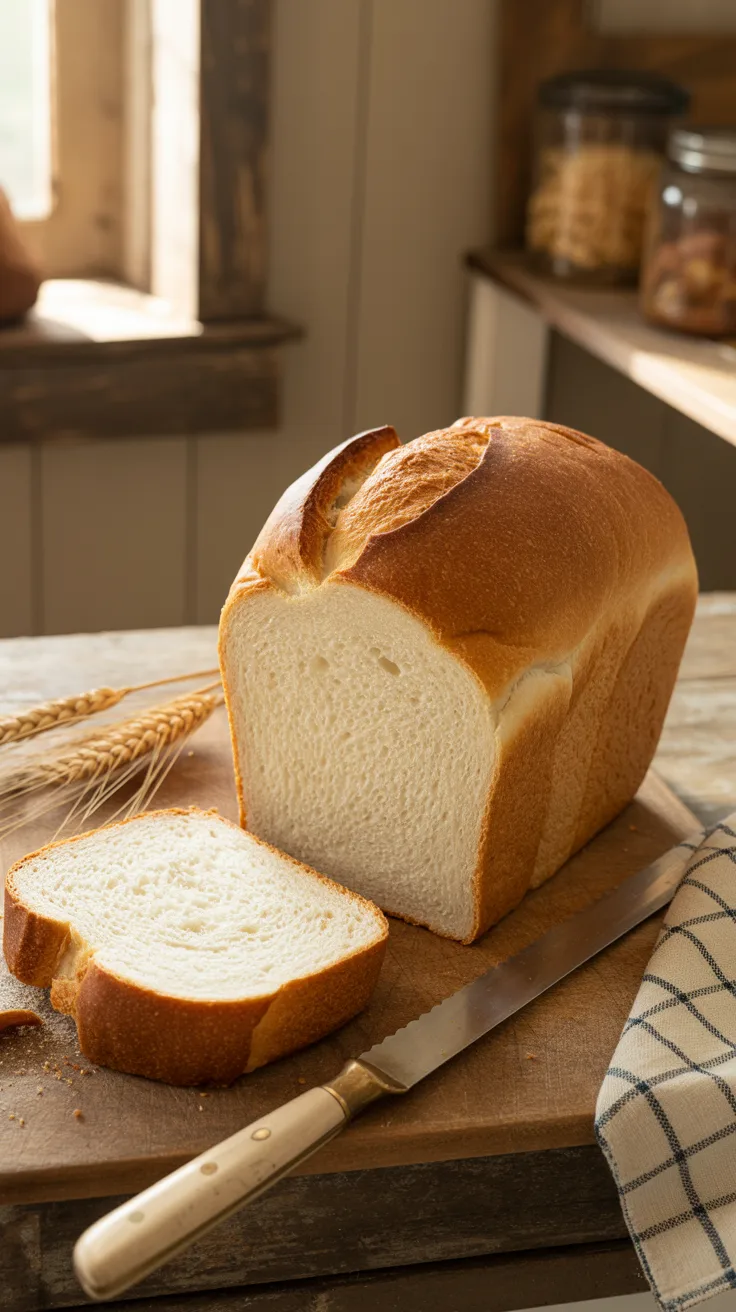
Amish white bread celebrates the essentials: flour, water or milk, yeast, sugar or honey, fat, and salt. Where it shines is the balance of softness and structure. It’s lighter and fluffier than many sandwich loaves thanks to a slightly enriched dough (a touch of sugar and fat) and patient kneading that develops a fine, even crumb. Unlike ultra-rich brioche, it stays sturdy enough to slice thin for sandwiches while remaining tender enough to make outrageously good French toast.
Homestyle versions often lean on practical techniques—gentle warming of liquids, hand-kneading until smooth, and proofing by feel. The goal is a dough that’s supple and slightly tacky but not sticky, a first rise that doubles without tearing bubbles, and a second rise that crowns just above the pan before baking. You’re rewarded with a thin, golden crust, tiny even holes, and a soft pull-apart interior that keeps well for several days.
Because the method is forgiving, this is an ideal bread for beginners. For experienced bakers, small tweaks—like adjusting hydration by a tablespoon or two, switching milk for water, or swapping honey for sugar—let you fine-tune flavor and softness. With the right cue-based approach, you’ll reliably produce the best Amish white bread in your own kitchen week after week.
Key ingredients and tools for Amish white bread success
Great bread doesn’t require fancy gear, but a few smart choices make a noticeable difference. Here’s a practical checklist, with flexible options to match what you have on hand.
- Flour:
- Bread flour gives the best structure and chew.
- All-purpose works too; expect a slightly softer crumb.
- Liquid:
- Warm water is classic and clean-flavored.
- Whole or 2% milk yields extra tenderness and a richer taste.
- Sweetener:
- White sugar offers neutral sweetness and fast yeast activation.
- Honey adds floral notes and keeps the crumb moist longer.
- Fat:
- Butter delivers savory richness.
- Neutral oil (canola, sunflower) gives softness and a cleaner finish.
- Yeast:
- Active dry yeast is traditional; proof it in warm liquid if you’re unsure of freshness.
- Instant yeast can be mixed right into the flour (use slightly less).
- Salt:
- Essential for flavor and controlling fermentation.
- Optional enrichers:
- One egg for extra color and softness (reduces the need for fat slightly).
- A splash of cream or powdered milk for added tenderness.
Recommended baseline formula (makes two 8.5 x 4.5-inch loaves):
- 800 g bread flour (about 6 1/3 cups)
- 520 g warm liquid (about 2 1/4 cups water or milk at 100–110°F / 38–43°C)
- 60 g sugar or honey (about 1/4 cup sugar or 3 tbsp honey)
- 45 g butter or oil (3 tbsp)
- 9 g instant yeast (about 2 3/4 tsp) or 11 g active dry (about 3 1/2 tsp)
- 14 g fine salt (2 1/4 tsp)
Helpful tools:
- Large mixing bowl and sturdy spoon or stand mixer with dough hook
- Digital scale (for consistency) and instant-read thermometer (optional, but helpful)
- Two loaf pans (8.5 x 4.5-inch recommended)
- Kitchen towel or plastic wrap for covering
- Cooling rack and bread knife for clean slicing
Notes:
- Weights provide consistency across climates and flour brands.
- Using milk instead of water tenderizes the crumb; consider slightly reducing sugar.
- Honey browns faster than sugar; tent with foil if tops darken too quickly.
Step-by-step process for the best Amish white bread
This is your reliable method from first mix to slice. Read once, then follow by feel.
- Warm and combine liquids
- Aim for 100–110°F (38–43°C). Too hot kills yeast; too cool slows it. If using butter, melt it gently and cool slightly before mixing.
- If using active dry yeast and you want to proof it: combine warm liquid with a pinch of sugar and yeast. Let stand 5–10 minutes until foamy.
- Mix the dough
- In a large bowl, whisk flour, sugar, and salt. Add yeast if using instant.
- Pour in warm liquid and fat (plus egg, if using). Mix until a shaggy dough forms; it will look rough and slightly sticky.
- Knead until smooth and elastic
- By hand: 8–12 minutes on a lightly greased surface (less sticking than flouring). Use a push-fold-turn rhythm.
- By mixer: 6–8 minutes on medium-low speed.
- The dough should feel supple, slightly tacky, and pass a gentle “windowpane” test—stretches thin without tearing easily.
- First rise (bulk fermentation)
- Place in a lightly greased bowl, cover, and let rise until doubled, 60–90 minutes at room temperature (cooler kitchens may take longer).
- If you press a floured finger gently into the dough, the indentation should slowly spring back but remain faintly visible.
- Shape the loaves
- Turn dough out, divide evenly (about 680–700 g each if weighing).
- Press each half into a rectangle; roll up tightly from the short end, pinching seams to build surface tension. Tuck ends under.
- Place seam-side down in greased loaf pans.
- Second rise
- Cover and proof until the dough rises 1–1.5 inches above the rim, 35–60 minutes depending on room temp.
- When gently poked, the dough should slowly spring back, leaving a slight indentation.
- Bake
- Preheat oven to 350°F (177°C).
- Brush loaves with milk, egg wash, or melted butter if desired.
- Bake 28–35 minutes. Internal temp should reach 190–195°F (88–90°C). Tops should be deep golden and sound hollow when tapped.
- Cool and slice
- Remove from pans after 5 minutes. Cool on a rack at least 60 minutes before slicing to set the crumb.
- For ultra-neat slices, let cool fully or refrigerate the loaf lightly before slicing.
Make-ahead tip:
- After shaping, you can refrigerate the pans (covered) overnight. Bake straight from the fridge, adding a few minutes to the bake time.
Keys to the best Amish white bread texture and flavor
Gentle warmth, proper hydration, and patience with fermentation are the big three. Here’s how to fine-tune them.
- Hydration sweet spot:
- Start with the baseline liquid; add a teaspoon at a time if dry, or a tablespoon of flour if too sticky.
- Weather matters. Dry climates need more liquid; humid conditions need slightly less.
- Gluten development:
- Knead until supple and elastic. The dough should feel alive—springy but relaxed.
- If the dough resists shaping and shrinks back, rest it 10 minutes to let gluten relax before continuing.
- Fermentation control:
- Warmer rooms speed proofing; cooler rooms slow it. Follow the dough, not the clock.
- Slightly under-proofing yields tighter crumb; slightly over-proofing can cause collapse. Aim for that slow-spring-back poke test.
- Crumb and crust:
- Butter or milk creates a thin, tender crust and moist crumb.
- For a lighter crust, brush with butter right after baking. For a slightly chewier crust, skip the post-bake butter and let loaves cool fully.
- Flavor depth:
- For more developed flavor, use less yeast and extend bulk fermentation (e.g., 2–3 hours) or proof part of the dough overnight in the fridge.
- Honey adds complexity and moisture retention; sugar is clean and classic.
Old-school pantry wisdom is at the heart of heritage loaves like this. If you’re building a resilient pantry and love classic, practical recipes, you may enjoy The Lost SuperFoods—a collection focused on timeless, durable staples and smart food storage strategies.
Troubleshooting the best Amish white bread
Even seasoned bakers have off days. These fixes help you course-correct quickly.
- Dense, heavy loaf:
- Under-kneaded dough lacks structure; knead until smoother and more elastic next time.
- Insufficient rise: give it more time, especially in cool kitchens. Dough should double before shaping.
- Too much flour: dough should be slightly tacky. Grease your hands instead of adding lots of flour.
- Overly airy with large tunnels:
- Over-proofed dough can inflate then deflate. Second rise should peak just above the pan.
- Shaping too loosely creates gaps; roll tightly and pinch seams well.
- Collapsed top:
- Over-proofing or slicing the top too early can cause a cave-in.
- Check oven temperature accuracy; too cool an oven extends bake time and weakens structure.
- Pale crust:
- Sugar or milk helps browning; consider a light egg wash.
- Ensure oven is fully preheated. A baking stone or steel can stabilize home ovens.
- Gummy or undercooked interior:
- Check internal temp (190–195°F).
- Let loaves cool at least 60 minutes; cutting hot bread compresses the crumb and traps moisture.
- Yeast not activating:
- Water might be too hot or yeast expired. Test with a small proofing cup next time.
- Salt should not directly contact yeast in a concentrated spot during mixing; blend salt into flour first.
If your loaf is close but not perfect, adjust only one variable at a time—hydration, knead duration, or proof time—so you can see exactly what improved.
Simple variations and creative uses
Once your base loaf is dialed in, these classic variations keep things interesting while preserving that Amish-style softness and structure.
- Honey-forward loaf:
- Swap all sugar for honey. Reduce liquid slightly (honey adds moisture). Expect deeper browning and a delicate floral note.
- Milk bread version:
- Use all milk for the liquid and butter for the fat. Add 1–2 tbsp dry milk for extra tenderness if desired.
- Tangzhong boost:
- Cook 2 tbsp flour with 1/2 cup water or milk over low heat until thick, cool, then add to the dough. This gelled starch holds moisture for ultra-soft crumb and longer freshness.
- Cinnamon swirl:
- Roll each dough half into a rectangle after the first rise. Brush with butter; sprinkle a mix of cinnamon and sugar. Roll tightly, pinch, and proof seam-side down. Bake as directed.
- Dinner rolls:
- Divide dough into 16–24 pieces, shape balls, and proof in a greased pan. Bake 18–22 minutes at 350°F until golden, brush with butter.
- Enriched “Sunday” loaf:
- Add one egg and use butter for fat. Expect fuller flavor and a softer, rich crumb—great for celebratory meals.
- Rustic crust variation:
- Skip the butter wash and bake a few extra minutes for a slightly more substantial crust.
- Seeds and toppings:
- For an old-fashioned finish, brush with egg wash and sprinkle with sesame or poppy seeds before baking.
Serving ideas:
- Toast with butter and jam in the morning
- Sturdy sandwiches that don’t fall apart
- Garlic bread with herb butter
- French toast and bread pudding (slightly stale slices are perfect)
- Grilled cheese with a thin, crisp exterior and molten middle
These tweaks preserve the essence of the loaf while giving you range for everyday meals and special occasions alike.
Storage, slicing, and smart kitchen routines
Homestyle loaves reward good habits. A few simple routines keep your bread at peak quality.
Storage:
- Room temperature: Store in a bread box or wrapped in a breathable bag 2–3 days. Avoid the refrigerator—chilling stales bread faster.
- Freezing: Slice the loaf, stack with parchment between slices, and freeze in a zip bag up to 3 months. Toast from frozen or thaw sealed at room temp.
- Moisture management: If your kitchen is humid, wrap more snugly. In arid climates, use a slightly more airtight bag to prevent drying.
Slicing:
- Allow loaves to cool fully for the neatest slices.
- Use a sharp serrated knife with gentle sawing motion; avoid pressing down.
Meal prep:
- Pre-slice and freeze half the loaf for weekday toast.
- Cube leftover slices for croutons or breadcrumbs; toast gently until dry and golden.
Recommended resources:
- For dependable kitchen water that supports yeast performance and consistent flavor: SmartWaterBox
- For pantry wisdom and heritage-style food ideas that pair perfectly with homestyle bread: The Lost SuperFoods
Amish white bread recipe card (print-friendly summary)
Yield: Two standard loaves (8.5 x 4.5-inch)
Ingredients:
- 800 g bread flour (about 6 1/3 cups)
- 520 g warm water or milk (about 2 1/4 cups, 100–110°F)
- 60 g sugar or 3 tbsp honey
- 45 g butter or 3 tbsp neutral oil
- 9 g instant yeast (2 3/4 tsp) or 11 g active dry (3 1/2 tsp)
- 14 g fine salt (2 1/4 tsp)
Method:
- Mix: Combine dry ingredients; add warm liquid and fat. Bring together into a shaggy dough.
- Knead: 8–12 min by hand or 6–8 in mixer until smooth and elastic.
- First rise: Covered, until doubled (60–90 min).
- Shape: Divide, roll tightly, pinch seams, and pan seam-side down.
- Second rise: Until 1–1.5 inches above pan rim (35–60 min).
- Bake: 350°F for 28–35 min to 190–195°F internal. Cool 60 minutes before slicing.
Tips:
- Brush tops with butter after baking for extra softness.
- Tent with foil if browning too quickly.
Keep it simple, shareable, and memorable
Homestyle bread wins when it’s repeatable. Start with the base formula, follow the dough’s cues, and keep notes on what works in your kitchen. Whether you use water for a clean flavor or milk and honey for extra tenderness, you’re minutes away from the best Amish white bread—soft, sliceable, and perfect for your week’s meals.
If you want to level up your kitchen readiness and keep staples at hand, explore heritage pantry ideas in The Lost SuperFoods. And for consistent dough performance season after season, consider SmartWaterBox to keep your water quality steady.
FAQ
What makes the best Amish white bread different from regular white bread?
Amish white bread is slightly enriched (a touch of sugar and fat), which creates a softer crumb and tender crust while staying sturdy for slicing.Can I use all-purpose flour instead of bread flour?
Yes. All-purpose yields a slightly softer crumb; you may need a little less liquid. Start with the baseline and adjust by feel.How warm should the water or milk be for the dough?
Aim for 100–110°F (38–43°C). Too hot can harm yeast; too cool will slow fermentation.How do I stop the loaf from collapsing?
Avoid over-proofing, shape tightly with good seam pinching, and bake fully to 190–195°F internal temp. Make sure your oven is truly at 350°F.Can I make this in a bread machine?
Yes. Use the dough cycle to mix and rise, then shape and bake in pans for the classic loaf shape, or use the machine’s bake cycle as directed.How long will Amish white bread stay fresh?
About 2–3 days at room temperature. Freeze slices for longer storage and toast straight from frozen.Is milk or water better for the best Amish white bread?
Water gives a cleaner flavor and slightly chewier crumb; milk produces a richer taste and softer texture. Both are authentic—choose your preference.