
If you’re building a cabin, studio, greenhouse, or homestead structures far from the grid, few materials hit the sweet spot of low cost, insulation, and DIY-friendliness like papercrete. Learning how to make papercrete opens the door to walls, blocks, and panels that repurpose waste paper into a durable, insulating composite—a practical choice when you need to stretch budgets, work with limited tools, and prioritize sustainability. For many off-grid builders, papercrete becomes the go-to for outbuildings, non-load-bearing walls, and cozy interiors that regulate temperature while keeping materials simple and local. If you’re laying out a full off-grid plan—power, shelter, water—pair your builds with water independence using Aqua Tower.
Papercrete isn’t magic. It requires moisture protection, smart design, and patient curing. But with a thoughtful mix and good detailing, it’s a highly adaptable solution that you can produce on-site with everyday tools. This guide walks you through composition, recipes, mixing methods, block and wall building techniques, finishes, durability, and off-grid design tips so you can get it right on your first build.
Table of Contents
Why learn how to make papercrete for off-grid builds
Papercrete is a composite created by pulping paper and combining it with Portland cement and fine aggregates like sand. The paper fibers act as a lightweight matrix that locks cement paste and sand together, producing a material that’s lighter than standard concrete and easier to work with while offering meaningful thermal performance. It’s not a drop-in structural substitute for concrete or masonry; instead, think of it as a versatile insulating and infill material you can shape into blocks, panels, or monolithic walls.
Key advantages:
- Resource efficiency: Uses recycled paper, cardboard, and junk mail you can collect locally.
- Workability: Easy to carve, saw, or drill once cured; forgiving for small crews and solo builders.
- Cost control: Paper is cheap or free; you scale cement content to your needs.
- Thermal comfort: A blend of insulation and thermal mass that suits off-grid living.
- Customizable: Adjust ratios for blocks vs. plaster-like fills; add pozzolans or fibers to tune performance.
Practical limitations:
- Moisture sensitivity: It must be protected from long-term exposure to liquid water and driving rain.
- Structural caution: Best used as non-load-bearing infill; rely on a timber, steel, or block frame for primary loads.
- Code acceptance: Some regions require testing or engineer approval. Start with accessory buildings to learn.
When you know how to make papercrete, you gain a maker’s material: you can pour it, trowel it, pack it into forms, or cast blocks that you later mortar like masonry. For off-grid builders, this flexibility is often the difference between a project that happens this season and one that stays on the wishlist.
Materials, tools, and safety for making papercrete
You can produce quality papercrete with basic equipment and thoughtful prep. Before you mix your first batch, line up your materials and establish a safe workflow.
Core ingredients:
- Paper sources: Newsprint, phone books, cardboard (non-waxy), office paper, egg cartons. Avoid glossy, plastic-coated, or heavily inked stock when possible.
- Portland cement: Type I/II is typical. Use fresh, dry cement; old, lumpy bags can compromise strength.
- Sand: Clean, sharp masonry sand (not beach sand). Fine aggregate improves strength and reduces shrinkage.
- Water: Clean water; avoid highly mineralized or contaminated sources.
- Optional modifiers: Lime (for breathability and workability), fly ash or metakaolin (pozzolans), polypropylene or natural fibers (for crack control), borate solution (mildew deterrent in some climates).
Essential tools:
- Pulping tool: A heavy-duty drill with a paint or mortar paddle in a barrel; a small concrete mixer; or a homemade “trommel” mixer. For larger batches, a towable mixer is ideal.
- Measuring containers: Buckets for consistent volumetric ratios.
- Forms and molds: For blocks, build robust wooden molds; for monolithic walls, use reusable formwork.
- Trowels and floats: For finishing faces and edges.
- Wheelbarrow or tubs: For transport and batch control.
- Scales and moisture meter (optional): Helpful for repeatable results.
Personal protective equipment and safety:
- Wear gloves, safety glasses, and a dust mask or respirator when handling dry cement and sand.
- Use hearing protection with power tools and mixers.
- Cement is caustic; rinsing skin promptly prevents irritation.
- Keep hoses, cords, and walkways organized to prevent trips and spills.
- Maintain good ventilation when mixing indoors or in enclosed spaces.
Waste and water use:
- Pulping uses water. Reuse graywater for pre-soaking paper where possible, and settle-out wash water so fines don’t enter your drain field. Responsible water practice fits the off-grid ethic and saves time.
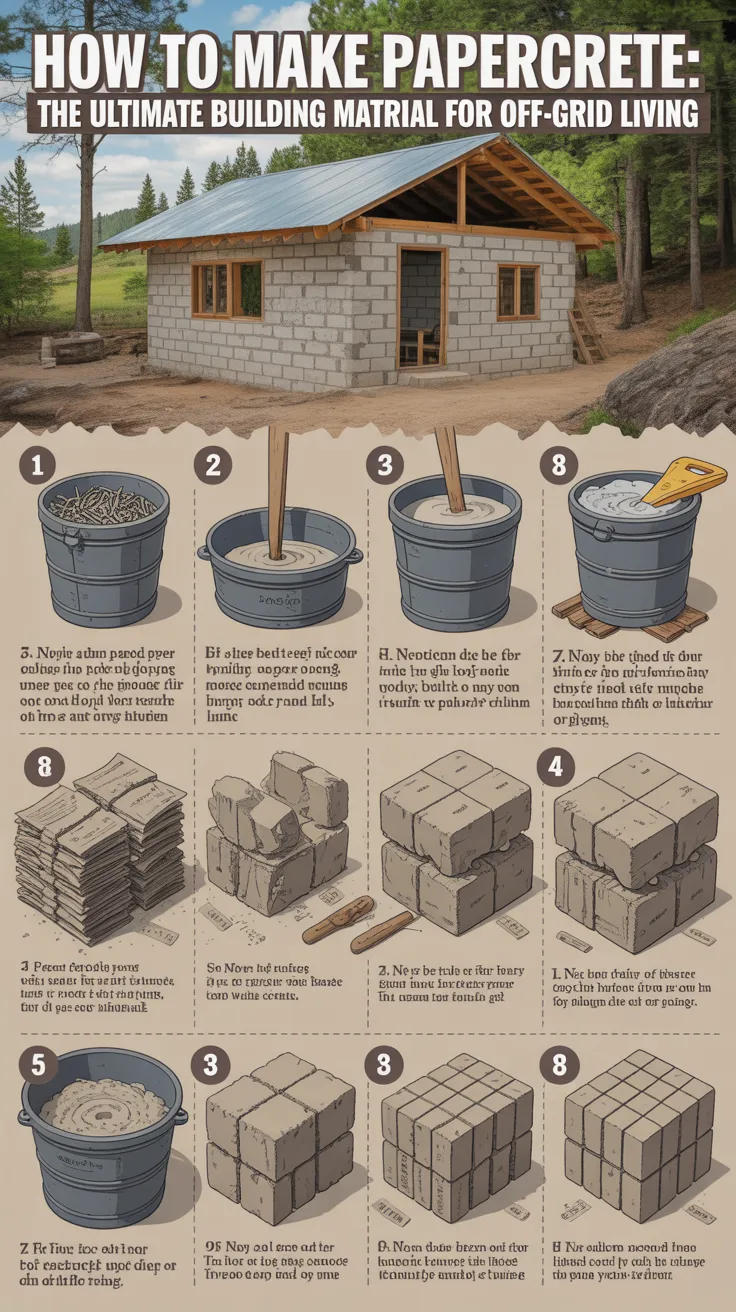
Recipes and ratios that actually work
There are many “recipes” for papercrete. Good mixes balance workability, strength, drying time, and insulation. Think by volume, not by weight, and test small batches before committing to a full day’s pours.
Starter recipes by volume:
- Block mix (balanced strength/insulation): 3 parts shredded paper pulp, 2 parts sand, 1 part Portland cement.
- Light, insulating mix (for non-load-bearing panels/infills): 4 parts paper pulp, 1.5 parts sand, 1 part cement.
- Stronger facing or base course mix: 2.5 parts paper pulp, 2.5 parts sand, 1.25 parts cement.
Paper pulp preparation:
- Shred or tear paper into strips for faster pulping.
- Soak in water for several hours to overnight.
- Agitate with a drill paddle or mixer until fibers form a uniform slurry with minimal clumps.
- Strain lightly to achieve a thick oatmeal consistency—too watery is slow to dry and weak; too dry won’t set properly.
Batching and mixing steps:
- In a mixer or tub, add your pre-pulped paper slurry.
- Sprinkle cement into the slurry while mixing to coat fibers and avoid cement balls.
- Add sand gradually until the mix thickens to a scoopable, cohesive mass.
- Adjust with small amounts of water; aim for a slump similar to stiff mortar. A squeeze test should produce a damp patty that holds shape with minimal dripping.
Consistency checks:
- Hand squeeze: The mix should compress without gushing water; released, it should keep form with slight spring-back.
- Trowel pull: Dragging a trowel should leave ridges that hold their shape.
- Test block: Cast a small block and demold after 24–48 hours. If it slumps or cracks excessively, tweak ratios.
Curing and shrinkage:
- Papercrete dries by water evaporation and cement hydration. Good airflow and shade reduce cracking.
- Expect some shrinkage. Sand content and fibers reduce shrink; add control joints for larger panels.
Additives and tweaks:
- Lime (hydrated): Adds workability and breathability; substitute 10–20% of cement.
- Pozzolans: Replace 10–25% of cement to refine pore structure and reduce cement demand.
- Fibers: A handful of polypropylene or chopped natural fibers per bucket helps resist microcracks.
Always document your test batches. Successful DIY builders keep a small notebook with ratios, weather conditions, and observed results.
Casting blocks, panels, and monolithic walls
How you make papercrete shapes depends on your build plan, crew size, and climate. Three common approaches:
- Blocks
- Build simple wooden molds—common sizes are 6x8x12 inches or 4x8x16 inches. Larger blocks are heavier and dry slower.
- Oil or line molds for easy release.
- Pack the mix firmly in lifts to remove voids. Tap sides with a rubber mallet.
- Screed the top flat. Lightly trowel for a dense face.
- Demold after 24–72 hours depending on temperature and humidity; handle gently until fully cured.
- Dry under shade with airflow, stacking on edge with spacers.
Pros: Precast blocks allow staged work and flexible scheduling. Cons: More handling; slow in humid climates.
- Panels
- Create frames from lumber or angle iron; reinforce with light mesh (plastic or galvanized) for handling strength.
- Pour or trowel mix to 1.5–3 inches thick for interior partitions or insulated shear panels (non-structural).
- Embed conduits or chases during casting.
- Cure flat, then stand the panels and fasten to a structural frame.
Pros: Fast wall assembly; clean runs for utilities. Cons: Requires space and careful curing to avoid warp.
- Monolithic walls (infill)
- Build a structural frame (timber, steel, or reinforced masonry).
- Install interior and exterior formwork with through-ties or cleats.
- Place papercrete in 8–12 inch lifts, rodding each lift to eliminate voids.
- Allow partial set between lifts to reduce slump.
- Remove forms once walls are firm; proceed to protective finishes once dry.
Pros: Fewer joints; sculptable surfaces. Cons: Slower drying; formwork complexity.
Anchoring and connections:
- Use embedded wood nailers, ledger strips, or screw anchors in frames—not in papercrete alone—for structural attachments.
- For doors/windows, build bucks from treated lumber, protect with flashing, and tie them back to the frame.
Weather basics during build:
- Keep fresh papercrete out of heavy rain; cover with breathable tarps.
- Avoid direct sun or strong wind on fresh surfaces; shade slows uneven drying and cracking.
Midway through any homestead build, injuries can slow progress. Having a practical medical reference is invaluable—especially off-grid. Consider keeping Home Doctor on hand so you can address minor wounds, sprains, or skin irritation from cement promptly and safely.
Finishes, waterproofing, and long-term durability
Papercrete’s biggest enemy is bulk water. The right finishes and details ensure decades of service.
Exterior protection:
- Base-to-wall separation: Raise walls at least 8 inches above grade with a masonry stem wall or treated sill. Install capillary breaks between masonry and papercrete.
- Overhangs: Design generous eaves and drip edges to keep walls dry.
- Rainscreen: For wet climates, add a ventilated cavity with furring strips and cladding (wood, fiber-cement). A rainscreen allows walls to dry.
- Plasters: Lime-based plaster is compatible and breathable; finish with a silicate or mineral paint. In arid climates, a robust lime render may be sufficient without cladding.
- Flashing: Use metal or high-quality flashing at windows, doors, and roof-to-wall intersections.
Interior finishes:
- Lime or clay plasters manage humidity and keep walls breathable.
- Paints: Favor mineral paints or vapor-permeable coatings, not plastic films that trap moisture.
- Trim and fixtures: Screw into structural nailers, not just papercrete.
Waterproofing caution:
- Avoid dense, non-breathable sealers directly on papercrete; they can trap moisture and cause deterioration. Think “shed water outside, allow drying everywhere.”
Freeze-thaw and climate:
- In cold, wet climates, the rainscreen approach is critical. Fully dry the wall before winter.
- In hot, arid climates, papercrete performs well with basic plaster and shade.
Fire and pests:
- Papercrete with cement and sand is relatively fire-resistant compared with raw straw or paper. Still, follow local codes for fire breaks and surface finishes.
- Borate solutions can deter insects or mildew, but finish systems and dryness are your first line of defense.
Maintenance:
- Inspect annually for cracks, seal terminations, and vegetation contact.
- Keep soil and mulch clear of walls.
- Recoat lime finishes every few years as needed.
Off-grid performance: thermal comfort, design, and water synergy
Comfort off-grid isn’t just about R-values; it’s about stable, breathable envelopes and passive strategies.
Thermal behavior:
- Papercrete offers a hybrid of insulation and thermal mass. It slows heat flow and buffers temperature swings. Wall thickness (6–12 inches) and sand/cement content influence performance.
- In cold climates, add interior mass (adobe bench, water barrels) and exterior shading to fine-tune lag and comfort.
- In hot climates, ventilated roofs, deep overhangs, and night purging (cool-air flushing) pair well with papercrete’s buffering ability.
Window and roof strategy:
- Orient glazing toward the sun in winter and shade with awnings or vegetation in summer.
- Prioritize a tight, well-insulated roof; consider light-colored metal for reflectivity and easy rainwater capture.
- Vent stacks or ridge vents reduce interior humidity and aid drying.
Foundations and floors:
- A dry, raised base keeps walls healthy. Rubble trenches with perimeter drains work in many soils; follow local engineering guidance.
- Thermal breaks under slabs reduce heat loss in cold climates.
Water resilience:
- Site drainage is non-negotiable: slope grade away from buildings, add French drains where needed.
- Plan downspouts to empty into cisterns or infiltration basins.
Food and independence:
- Off-grid builds become truly livable when shelter is matched with reliable food strategies. If you’re building a pantry alongside your project, The Lost SuperFoods can help you plan shelf-stable staples and redundancy that fit a remote lifestyle.
Testing and learning cycle:
- Start with a small structure—tool shed, pump house, or greenhouse knee wall—before tackling living spaces. Use lessons learned to refine mixes, finishes, and details.
Budgeting, sourcing, codes, and scaling up
Papercrete’s budget appeal is real—but plan carefully to avoid surprises.
Cost drivers:
- Cement and sand: Your main purchased inputs. Prices vary regionally; buying in bulk reduces costs.
- Tools and forms: Reusable forms and a good mixer provide long-term value.
- Finishes: Lime plaster, rainscreens, and cladding add cost but are essential for durability.
- Time: Curing and drying require patience; schedule builds in dry seasons when possible.
Paper sourcing:
- Coordinate with local newspapers, offices, schools, and recyclers. Clean storage keeps paper dry and mold-free.
- Pre-shred or tear on prep days with friends; batching goes faster when pulp is ready.
Project planning:
- Phase work: Cast blocks early, cure while you prepare foundations.
- Weather windows: Align wall assembly with dry stretches; protect fresh work with breathable covers.
- Utilities: Embed conduits and boxes in panels/infills to avoid cutting later.
Codes and permitting:
- Papercrete is not universally recognized. Consult your authority having jurisdiction.
- Strategies: Use papercrete as non-load-bearing infill within an approved structural frame; have an engineer stamp the frame; provide small-scale test data if requested.
- Documentation: Photograph test batches, note ratios, and keep samples.
Scaling up:
- Crew workflow: One person mixing, one transporting, two packing forms is efficient.
- Quality control: Standardize bucket measures; designate a lead to approve water content per batch.
- Site layout: Keep pulp, sand, cement, water, and forms within short wheelbarrow distances.
If water security is the next step in your homestead plan, look into hands-on solutions now. A reliable water strategy complements durable papercrete construction and keeps your build site functional through every season.
Get water-secure while you build
Papercrete thrives when your site is well-drained and your household has dependable water. If you’re exploring options:
- Learn practical approaches to tapping local water sources with Joseph’s Well.
- For compact storage and treatment that fits small homesteads, see SmartWaterBox.
A water-secure site means better curing, cleaner mixing, and resilience when weather turns.
Recommended off-grid resources
- Aqua Tower: A practical way to support off-grid water needs so your build and household routines stay on track.
- Home Doctor: A straightforward medical reference for remote living and jobsite mishaps.
- The Lost SuperFoods: Ideas for shelf-stable foods and pantry planning to match the pace of long DIY projects.
- Joseph’s Well and SmartWaterBox: Complementary resources for sourcing and storing water.
Common mistakes and how to avoid them
- Over-wet mixes: Leads to slump, long dry times, and weak blocks. Fix by increasing sand or allowing pulp to drain longer.
- Thin exterior finishes: A skim coat isn’t enough. Use robust lime plaster and/or a rainscreen in wet climates.
- No capillary break at base: Wicking moisture up from grade is a silent failure mode. Always separate papercrete from soil and concrete with membranes.
- Rushing curing: Demolding too soon or loading walls prematurely leads to cracks. Respect curing time and airflow.
- Treating papercrete as structural: Don’t. Use a proper frame to carry loads.
Conclusion
Learning how to make papercrete positions you to build durable, comfortable, and affordable off-grid spaces with materials you can source locally. By balancing paper pulp, cement, and sand, you can cast blocks and walls that insulate well, shape easily, and stand up when protected from liquid water. Pair good mixes with smart details—raised bases, generous overhangs, breathable finishes—and you’ll gain a reliable building system for sheds, cabins, and utility spaces that serve your homestead for years. As you refine your craft, scale from test blocks to full walls, keep notes on ratios and curing, and integrate water-secure site planning so your projects run smoothly. Papercrete shines when you take a whole-systems approach: shelter, water, food, and maintenance aligned with the realities of off-grid living.
FAQ
Is papercrete strong enough for houses?
Papercrete is best used as non-load-bearing infill or blocks within a structural frame (timber, steel, or reinforced masonry). It offers good compressive resistance for its weight, but it’s not a substitute for engineered structural materials. Design the frame to carry loads; use papercrete for enclosure and insulation.How waterproof is papercrete?
Papercrete is moisture-sensitive and should be protected from bulk water. Elevate it above grade, add overhangs, use lime plaster and rainscreens in wet climates, and allow drying to both sides when possible. Avoid non-breathable coatings that trap moisture.What is the best mix ratio for beginners?
A reliable starting point is 3 parts paper pulp, 2 parts sand, and 1 part Portland cement by volume. Adjust water to achieve a stiff, cohesive mix. For lighter, more insulating infill, increase paper slightly; for stronger faces or base courses, increase sand and a touch of cement.How long does papercrete take to dry and cure?
Initial set can occur within 24–72 hours depending on temperature and humidity, but full drying and strength development take weeks. Provide shade and airflow, avoid heavy loads early, and plan long, gentle curing for thick walls and humid climates.Can I plaster directly onto papercrete?
Yes, lime or clay plasters bond well. Scratch-coat the surface to key the plaster, then apply one or two finish coats. In wet climates, favor a rainscreen and cladding over direct exterior plaster, or use robust lime systems with careful detailing.Is papercrete fire-resistant?
Compared to raw cellulose materials, papercrete is relatively fire-resistant due to cement and mineral content, especially when finished with lime or mineral coatings. Always follow local fire codes and add approved fire barriers where required.How does papercrete compare to cob or hempcrete?
Papercrete is lighter and often easier to process from recycled materials than cob; it can be faster to mix and place. Compared to hempcrete, papercrete can be cheaper if paper is abundant, with similar roles as a non-structural insulating infill. All require moisture-smart detailing.What tools do I really need to start?
At minimum: a heavy-duty drill with a mixing paddle, buckets, a wheelbarrow or tub, molds or forms, and trowels. A small concrete mixer improves consistency for larger batches.