
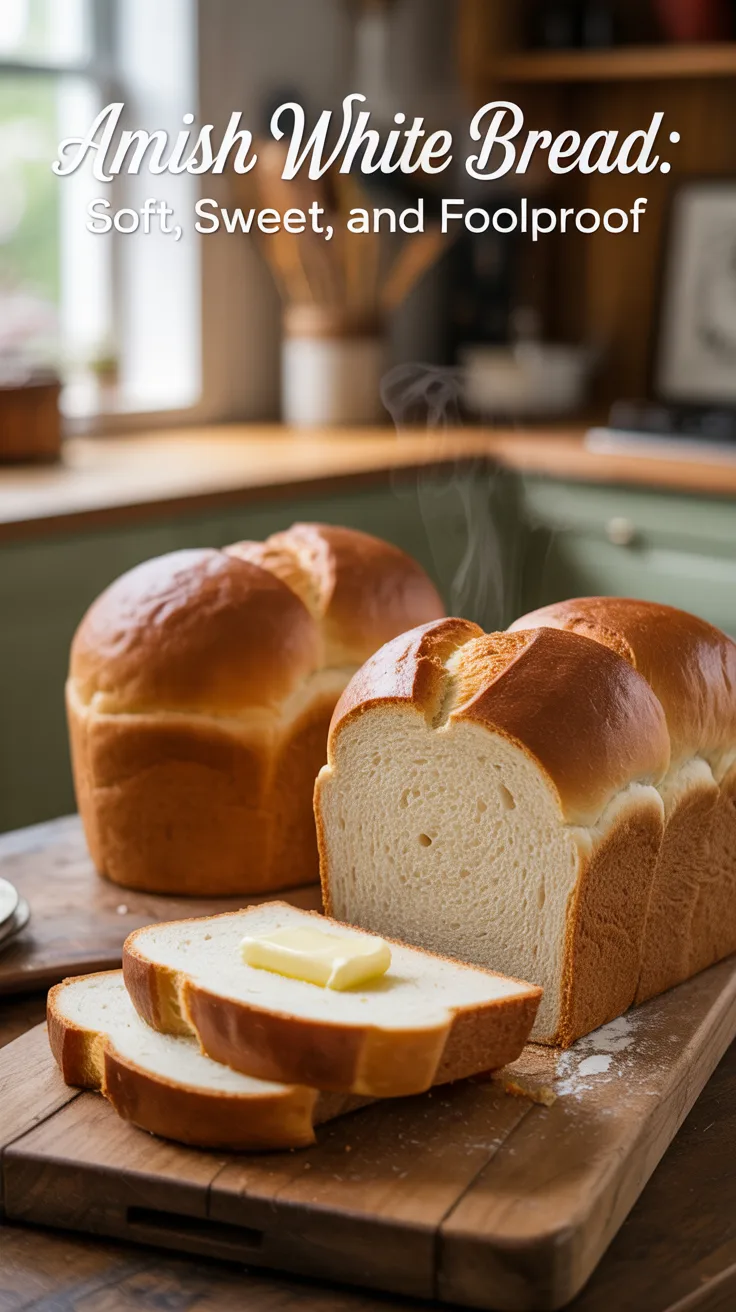
Few loaves deliver the nostalgia, aroma, and melt-in-your-mouth tenderness quite like Amish White Bread. This classic, slightly sweet sandwich bread bakes up with a soft, plush crumb and golden top—perfect for toast, PB&Js, French toast, and everyday meals. Whether you’re new to bread baking or leveling up your weekly loaf, this guide covers ingredients, method, troubleshooting, variations, and storage so your bread turns out reliably perfect every time.
If you love baking traditional staples and building a resilient pantry, you may also enjoy the old-school preservation knowledge in The Lost SuperFoods. It’s a handy companion to classic recipes like this one.
Table of Contents
Why this loaf stands out
Amish White Bread has a reputation for approachability and results. It’s forgiving, flexible, and works with pantry basics. The gentle sweetness and enriched dough make it uniquely soft without being cake-like, and its structure slices beautifully for sandwiches.
Highlights you’ll notice in every slice:
- Soft, springy crumb: The dough is enriched with sugar and oil or butter, making it velvety and tender.
- Gentle sweetness: Enough sugar to encourage browning and softness, not so much that it tastes like dessert.
- Versatile shape: Bake in standard loaf pans, roll into dinner rolls, twist into cinnamon swirls, or pullman-pan it for ultra-square sandwich slices.
- Foolproof process: A straightforward mix, knead, rise, shape, bake routine that’s ideal for beginners and batch bakers.
A bit of tradition in the technique
- Some Amish and farmhouse versions use “potato water” (the starchy water left from boiling potatoes) for exceptional softness and keeping quality. This starch helps create a cloud-like crumb and extends shelf life.
- Many families bake two loaves at once, reducing time per loaf and ensuring there’s always bread for meals and snacks.
A flavor profile tuned for everyday eating
- Mild, buttery notes with a light sweetness that complements both savory and sweet toppings.
- Golden crust that’s thin and tender—easy to bite and lovely for kid-friendly sandwiches.
Baker-friendly flexibility
- Swap milk for water when you want extra richness, or use a blend for balance.
- Use instant or active dry yeast; this dough is accommodating.
- Works with all-purpose or bread flour; bread flour adds a little more chew and lift, while all-purpose keeps it extra tender.
By the end of this guide, you’ll know how to turn basic pantry staples into the softest, most reliable homemade loaf you’ve ever baked.
Amish White Bread ingredients and smart substitutions
This recipe yields two standard loaves (8.5 x 4.5-inch or 9 x 5-inch pans). You can halve it for one loaf.
Base ingredients
- Warm water: 2 cups (480 g), 100–110°F. For richer taste, use 1 cup water + 1 cup milk.
- Granulated sugar: 2/3 cup (130 g). For slightly less sweetness, use 1/2 cup (100 g).
- Active dry yeast: 1 1/2 tablespoons (about 13–14 g). Or instant/rapid-rise: 4 teaspoons (12 g).
- Salt: 1 3/4 teaspoons (10–12 g).
- Neutral oil or melted unsalted butter: 1/4 cup (60 g).
- Bread flour: 6 to 6 1/2 cups (750–820 g), added gradually. All-purpose flour works; start with 5 1/2 cups and add if needed.
Optional enrichments
- Potato water: Replace some or all of the water with well-salted potato boiling water (cooled to 100–110°F). This adds softness and improves shelf life.
- Honey: Substitute honey for sugar by weight; honey will create a slightly moister crumb and deeper flavor.
- Milk powder: 2–3 tablespoons for extra tenderness and browning if using water only.
- Egg wash or butter brush: Brush baked loaves with melted butter for a soft, shiny top; or use milk/egg wash before baking for richer color.
Baker’s percentage (approximate)
- Flour: 100%
- Water: 64%
- Sugar: 13%
- Fat: 8%
- Salt: 2%
- Yeast: 2%
Flour choices
- Bread flour: Higher protein for better gluten strength and loft. Great for sandwich slices that hold up to fillings.
- All-purpose flour: Softest crumb and a bit more tender. If your AP flour is lower protein, mix in 10–20% bread flour for structure.
Yeast and proofing notes
- Active dry yeast benefits from proofing in warm water with a teaspoon of sugar for 5–10 minutes until foamy.
- Instant yeast can be mixed directly into flour without proofing; just ensure your liquid is warm, not hot.
Salt and sugar balance
- Sugar enhances browning, tenderness, and yeast activity. If you reduce sugar, the crumb will be a touch less plush.
- Keep salt in the 1.8–2% range for good flavor without slowing fermentation too much.
Water quality matters
- Clean, neutral-tasting water helps yeast thrive. If you’re in an area with off-tasting tap water, consider filtering. For long-term kitchen resilience, systems like SmartWaterBox are helpful for reliable, good-tasting water—useful for both cooking and everyday life.
Step-by-step method for perfect Amish White Bread
- Proof the yeast (if using active dry)
- In a large mixing bowl, combine warm water (or milk/water blend) and sugar; stir to dissolve.
- Sprinkle active dry yeast over top and let stand 5–10 minutes. It should become foamy and bubbly. If not, your yeast may be expired or your water too hot or too cold.
If using instant yeast, skip proofing and add instant yeast to the flour in step 2.
- Mix the dough
- To the foamy mixture, add oil or melted butter and salt.
- Add 3 cups of flour and mix until a thick batter forms.
- Continue adding flour 1/2 cup at a time until a soft dough pulls away from the bowl. It should be slightly tacky but not sticky.
- Knead until smooth and elastic
- By stand mixer (dough hook): 6–8 minutes on medium-low, adding flour only if the dough puddles at the bottom.
- By hand: Turn the dough onto a lightly floured surface and knead 8–10 minutes. Use a push-fold-turn rhythm, dusting lightly as needed.
- Goal: Dough should be smooth, elastic, and pass a gentle “windowpane” test (a thin, stretched membrane without tearing). Target dough temperature: ~75–80°F.
- First rise (bulk fermentation)
- Shape into a ball and place in a lightly oiled bowl, turning once to coat.
- Cover and let rise at warm room temperature (75–80°F) until doubled, about 60–90 minutes. Cooler kitchens will take longer.
- Shape into loaves
- Gently deflate the dough and divide into two equal pieces (use a scale for even loaves).
- Press each piece into a rectangle roughly the length of your pan. Roll up tightly from the short edge, pinching the seam closed. Tuck the ends under for a neat loaf.
- Place seam-side down in greased loaf pans.
- Second rise (proof)
- Cover lightly and proof until the dough crowns 1–1.5 inches above the rim, about 35–50 minutes depending on room temp and flour type.
- Avoid overproofing; a finger pressed gently into the dough should spring back slowly, leaving a slight indentation.
- Bake
- Preheat oven to 350°F (175°C).
- Bake 28–34 minutes. Loaves are done when the tops are deep golden and the internal temperature reaches 190–195°F.
- Optional: Brush hot loaves with melted butter for a satiny, soft crust.
- Cool and slice
- Remove from pans immediately to prevent sogginess and cool on a rack at least 1 hour before slicing.
- Use a sharp serrated knife or a bread slicer guide for neat, even slices.
Tips, timing, and troubleshooting
Dial in fermentation
- Warmer kitchen? Shorter rise times. Cooler kitchen? Longer rise times. Watch the dough, not the clock.
- A slightly tacky dough yields a softer crumb than a dry one. Resist adding too much flour.
Crumb and texture tips
- For extra soft bread, use some milk (or milk powder) and brush loaves with butter after baking.
- For taller loaves, ensure good gluten development: knead to smooth elasticity and give the dough enough time to rise fully.
Common issues solved
- Dense loaf: Usually under-kneaded dough or underproofed. Knead until elastic and let rise fully to double.
- Gummy interior: Either underbaked or sliced too soon. Bake to 190–195°F internal temperature and rest for at least an hour before slicing.
- Collapsed top: Overproofed second rise or oven temperature too low. Proof until just above the pan and bake promptly in a fully preheated oven.
- Pale crust: Increase baking time a few minutes or verify oven temp with an oven thermometer. A touch of milk or sugar aids browning.
- Dough too sticky: Add flour 1 tablespoon at a time during kneading, but keep the dough slightly tacky for tenderness.
Altitude and climate adjustments
- High altitude: Add 1–2 tablespoons extra liquid and reduce yeast by 1/4. Proof slightly less to avoid overexpansion.
- Very dry climate: Dough may need more water. Cover during rest to prevent skin formation.
Time-saving approaches
- Refrigerator bulk rise: After kneading, let the dough rise overnight in the fridge for better flavor. Bring to room temp, shape, proof, and bake the next day.
- Make-ahead dough: Shape and pan, then refrigerate covered for up to 12 hours. Allow to warm and finish proofing before baking.
Flavor enhancements
- Replace part of the sugar with honey for a rounder sweetness.
- A tiny splash of vanilla or a dusting of cinnamon in the dough yields a cozy breakfast loaf.
Variations and creative uses
Classic cinnamon swirl
- Dough: Use the base recipe. After first rise and divide, roll each piece into a rectangle.
- Filling: Mix 1/3 cup sugar with 1 1/2 tablespoons cinnamon per loaf. Optionally add a tablespoon of soft butter.
- Roll tightly, pinch seams, and bake as usual. Rest fully before slicing for clean swirls.
Cinnamon raisin
- Fold 1–1 1/2 cups raisins into the final minute of kneading. Use the cinnamon swirl technique or simply incorporate cinnamon into the dough.
Dinner rolls
- Divide dough into 24 equal pieces. Shape into tight balls and arrange in a greased 9 x 13-inch pan.
- Proof 25–35 minutes and bake 18–22 minutes at 350°F until golden. Brush with butter.
Pullman sandwich loaf
- Use a 13 x 4 x 4-inch Pullman pan. Fill the pan about 2/3 full after shaping.
- Proof until it rises close to the lid. Bake with lid on for straight-sided slices.
Hamburger buns
- Divide into 12 pieces, shape into rounds, flatten slightly, and proof until puffy.
- Bake 15–18 minutes at 375°F. Brush with butter for a softer top.
Potato water loaf
- Swap in potato water for some or all of the liquid. Expect a silkier crumb and better shelf life, plus a subtle richness.
French toast and bread pudding
- Day-old Amish White Bread shines in French toast; its tender crumb soaks custard without falling apart.
- For bread pudding, dry cubes in a low oven and proceed with your favorite custard.
Savory spin
- Fold in minced garlic and herbs with the flour for a simple herb loaf that pairs beautifully with soups and stews.
- Top with a light sprinkle of shredded cheese in the last 5 minutes of baking for a cheesy crust.
Storing, freezing, and revival
Counter storage
- Cool loaves completely and store in a bread box or bag at room temperature.
- Avoid refrigeration, which accelerates staling. The loaf stays soft 2–3 days at room temp.
Freezing
- Slice, then wrap the loaf tightly in plastic and place in a freezer bag, or wrap whole loaves in two layers to prevent freezer burn.
- Freeze up to 2–3 months. Thaw at room temperature in the bag to preserve moisture.
Revival techniques
- Slightly stale bread? Warm slices in a toaster or the whole loaf in a 300°F oven for 8–10 minutes.
- For next-level softness, lightly mist the crust with water before warming.
Safe slicing and serving
- Use a serrated bread knife and gentle sawing motion to avoid compressing the crumb.
- For mess-free sandwiches, let the loaf cool fully and slice at 1/2–3/4 inch thickness.
Reducing waste
- Convert dry ends to breadcrumbs or croutons: Cube, toss with a bit of oil and seasoning, and bake at 300°F until crisp.
- Make overnight French toast casserole with leftover slices for a weekend brunch treat.
Pantry-minded habits
- Keep a rotation: one loaf fresh, one in the freezer.
- Consider long-term pantry planning and traditional food strategies like those found in The Lost SuperFoods to support regular from-scratch baking.
Scaling, equipment, and sourdough adaptation
Scaling up or down
- Halve all ingredients for one loaf; keep the same procedure and baking time, watching Doneness by color and internal temp.
- For three loaves, multiply every ingredient by 1.5 and divide dough evenly by weight for uniform rise and bake.
Equipment essentials
- Mixing bowl and sturdy spoon or stand mixer with dough hook.
- Bench scraper for tidy kneading and portioning.
- Two loaf pans (8.5 x 4.5-inch or 9 x 5-inch), lightly greased.
- Kitchen scale for accuracy.
- Oven thermometer to verify true baking temperature.
- Instant-read thermometer for checking internal loaf temperature.
Bread machine method
- Add liquids, sugar, salt, then flour and yeast (keeping yeast separate from salt).
- Use “dough” cycle, then remove, shape, proof, and bake in standard pans at 350°F. Or bake in the machine, but oven baking yields a nicer crust.
Sourdough-style version
- Build a sweet starter: Refresh a mature starter and use 150 g active, bubbly starter in place of part of the water and flour.
- Reduce yeast: For a hybrid loaf, use 1–2 teaspoons instant yeast; for pure sourdough, omit commercial yeast and extend rise times significantly.
- Expect a slightly tangier loaf with more complexity, though still mild if you keep sugar in the formula.
Flavor tweaks that stay true to style
- Swap 10–20% of the white flour with finely milled whole wheat for gentle nuttiness without sacrificing softness.
- Add a tablespoon of vanilla and a pinch of nutmeg for a breakfast-leaning loaf.
Resilient kitchen note
- If your cooking plans include more self-reliant living—gardening, pantry baking, and reliable water—tools like SmartWaterBox can help ensure consistent, good-tasting water for bread baking and beyond.
Helpful resources for a resilient, self-reliant kitchen
If Amish White Bread is part of your from-scratch routine, these resources pair nicely with a homestead-style kitchen:
- The Lost SuperFoods: A collection of traditional food preservation and pantry strategies—useful for menu planning around homemade staples.
- SmartWaterBox: A practical way to bolster water reliability and taste in the kitchen and home.
- Home Doctor: A practical guide for handling common health situations at home—handy for families focused on self-reliance.
Use any resource that fits your goals; the bread itself needs only everyday ingredients and your attention to time and temperature.
Conclusion: bake your best Amish White Bread
This soft, slightly sweet staple is as welcoming as it is reliable. With a few pantry ingredients and the time-honored rhythm of mix, knead, rise, and bake, you’ll have two golden loaves of Amish White Bread ready for sandwiches, toast, and comforting meals all week. When you’re ready to explore more pantry-friendly skills, consider traditional food knowledge like The Lost SuperFoods and keep your kitchen running smoothly with dependable water from SmartWaterBox. Happy baking.
FAQ
How sweet is Amish White Bread compared to regular sandwich bread?
Amish White Bread is gently sweet—enough to brown beautifully and create a tender, velvety crumb. It’s sweeter than a classic country loaf but not as sweet as brioche, making it great for both savory sandwiches and breakfast toast.
Can I use whole wheat flour in Amish White Bread?
Yes. Replace 10–20% of the white flour with whole wheat for light nuttiness and extra nutrition without sacrificing softness. If you go higher, add a touch more liquid and allow extra time for the dough to hydrate and rise.
Why did my Amish White Bread come out dense?
Dense loaves usually stem from under-kneading or underproofing. Knead until the dough is smooth and elastic, and let it rise fully to double. Ensure your yeast is active and your liquid is warm, not hot. Internal loaf temperature should reach 190–195°F.
What’s the best way to store Amish White Bread?
Cool completely and store at room temperature in a bread box or bag for 2–3 days. Freeze sliced or whole loaves for up to 2–3 months. Avoid refrigeration, which accelerates staling. Refresh in a 300°F oven for 8–10 minutes to revive softness.
Can I make Amish White Bread with milk instead of water?
Absolutely. Milk enriches the dough, adding tenderness and flavor. Use all milk or a 50/50 blend with water. You can also add 2–3 tablespoons of milk powder if you stick to water for convenience.
Does potato water really make a difference in this recipe?
It can. Potato water adds extra starch, which improves softness and shelf life. Cool it to 100–110°F before using and reduce the salt a touch if your potato water is salty.
How do I know when my loaves are fully baked?
Look for a deep golden color and an internal temperature of 190–195°F measured with an instant-read thermometer. The loaf should feel lightweight for its size and sound hollow when tapped on the bottom.
How can I get even slices for sandwiches?
Use a serrated bread knife and let the loaf cool completely before slicing. A slicing guide helps create uniform slices, or bake in a Pullman pan for straight-sided, square slices.