
A hand-built earthen (cob) oven is one of the most satisfying, low-cost additions to a homestead. But many first-time builders struggle with fissures, slumps, or spalling. This comprehensive guide shows you how to build an earthen oven without cracks or failures by focusing on soil science, structure, drying, and weatherproofing—so your oven bakes beautifully for years. If you’re new to natural building, don’t worry—follow the steps and checks below and you’ll avoid the most common pitfalls from day one.
For mixing cob and keeping your project hydrated through each stage, having a reliable, safe water stash on hand is invaluable. A compact, off-grid-friendly solution like SmartWaterBox can make on-site building simpler and more consistent.
Table of Contents
Site, size, and core design principles that prevent cracking
Choose a site that keeps your oven stable and dry. Moisture is the enemy of earthen structures: it causes swelling, freeze–thaw damage, and drying cycles that lead to cracking. Look for:
- High ground with good drainage and a firm subgrade.
- Wind protection to minimize uneven drying.
- Shade or the ability to rig a breathable tarp canopy for controlled curing.
- Safe clearance from structures and trees; maintain fire safety rules and local codes.
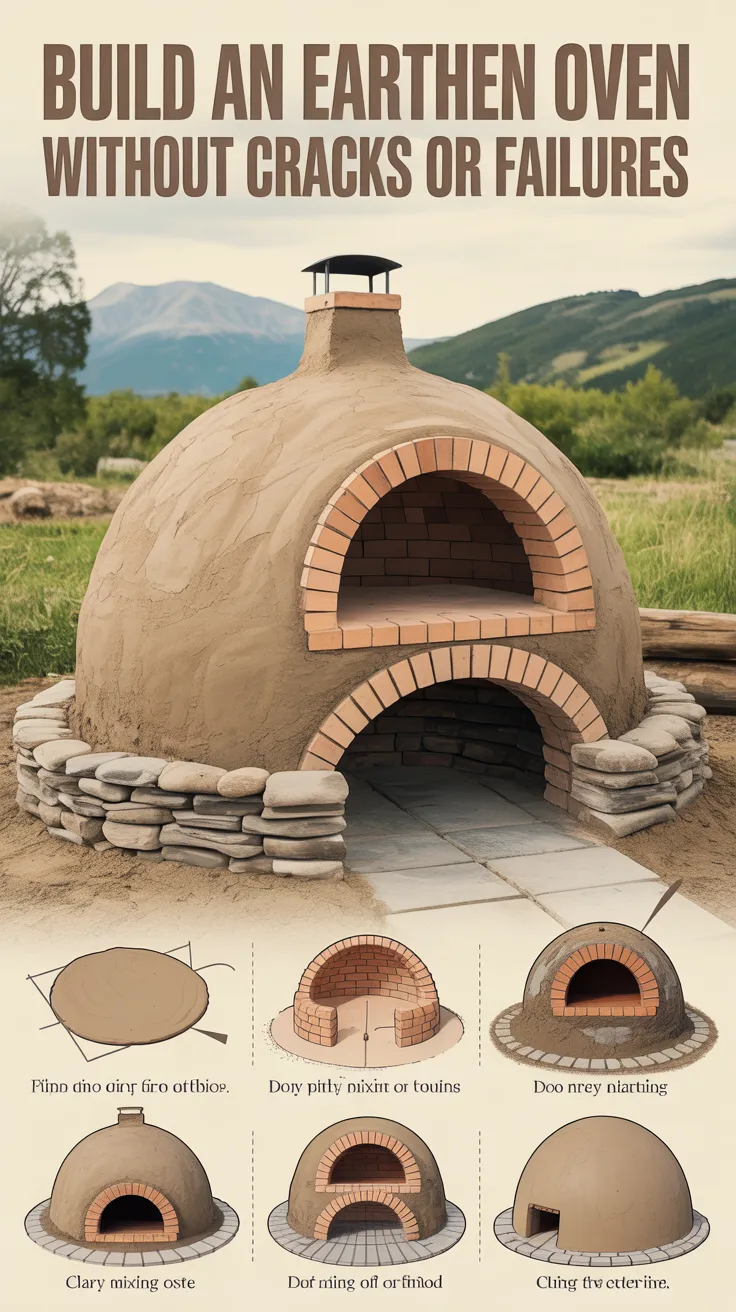
Set your goal and size. A 24–30 inch interior diameter dome is perfect for most families. Larger ovens hold heat longer but demand more precise construction to avoid structural stress. Choose your footprint and work backward from capacity needs.
Respect oven geometry. Classic earthen ovens use a low dome for radiant, conductive, and convective heat synergy:
- Dome height: roughly 60–70% of the interior diameter (many builders aim near 63–65%).
- Door height: about 63% of the dome height. This ratio helps retain heat and vent smoke correctly.
- Door width: wide enough for your largest peel plus clearance (often 12–16 inches), but not so wide that it weakens the arch.
Think layers with purpose:
- Foundation: rigid, non-absorbing base with a capillary break.
- Insulation under the hearth: reduces heat loss to the base, protects the oven from thermal stress.
- Thermal mass (clay/sand): stores and radiates heat. This is the “working” oven shell.
- Insulation over the mass: keeps heat in the dome, reduces temperature gradients.
- Breathable finish: protects from weather while allowing moisture to escape.
Remember the crack formula: crack risk rises with excess clay, too much water, fast drying, and sudden temperature changes. Your whole process—material selection through curing—should reduce shrinkage and differential movement. Create a building schedule that avoids rushing: plan stages so each layer rests and firms before the next.
Finally, consider a simple roof. Even a small shed roof dramatically extends the life of an earthen oven and is your most reliable shield against failures caused by weather.
Soil, sand, and fiber: the mix science that stops shrinkage
Your earthen oven’s success starts with the soil. “Clay” in common terms is soil with clay minerals plus silt and fine particles. The working ratio that resists cracking is usually sand-rich, because sand doesn’t shrink as it dries; clay does.
Test your soil:
- Ribbon test: Moisten soil and roll a “sausage” about 1/2 inch thick. If you can form a ribbon 2–3 inches long without crumbling, you have enough clay.
- Jar test: Fill a clear jar with a soil sample and water, shake hard, and let it settle for 24–48 hours. Layers will show sand (bottom), silt (middle), clay (top). Use this to estimate proportions.
- Ball drop: Form a golf-ball-sized mud ball. Drop from waist height onto a hard surface. If it shatters, you need more clay; if it smears and sticks badly, you need more sand.
Aim for a sand-heavy mix. Many ovens use a base ratio around 70–80% sharp, well-graded sand to 20–30% workable clay by volume, adjusted to your soil’s actual clay content. Use angular (sharp) sand to interlock particles and strengthen the mass; rounded sand can weaken the structure and increase slump.
Water is critical—but less is more. Add just enough water to bind. The mix should be plastic and moldable, not soupy. Think “firm modeling clay” rather than “mud.” Over-wet mixes shrink more, inviting cracks as they dry.
Use fibers strategically. Straw chopped to 1–3 inches, or similar fibers, helps bridge micro-cracks and spread stresses. The thermal mass layer typically has little or no straw for a dense cooking surface, while insulation and some structural layers benefit from fiber. Horse manure (pre-wetted and mixed) can add fine fibers and binders for exterior plasters.
Mix thoroughly. Foot-mix on a tarp: fold the tarp edges to knead the mass, rotating often. Uniformity matters: dry pockets crack and wet pockets slump. Test small bricks from each batch. Let them dry slowly and note cracking; tweak sand/clay as needed before committing to the dome. Reinforce your decisions by keeping notes—your soil is unique, and your optimal mix is a measured result, not guesswork.
Foundation and insulated base that keep moisture and stress away
Most oven failures begin below the hearth. Build a base that rejects moisture, carries weight, and resists frost heave.
Start with drainage. Excavate organic topsoil until you reach firm subsoil. If you’re in a wet climate, dig a shallow rubble trench around the footprint—8–12 inches deep—filled with compacted gravel to move water away. In cold zones, foundations must extend below frost depth or use a well-drained floating slab to prevent frost jacking.
Create a capillary break. On compacted subgrade, lay 4–6 inches of angular gravel. Compact thoroughly. This layer stops water from wicking upward. Over the gravel, add a stable, level platform: dry-stacked stone with gravel infill, concrete blocks, or a reinforced concrete pad. Ensure it’s dead level and strong enough for the oven’s mass (often 1,000–2,000+ pounds).
Plan comfortable working height. The hearth height should be roughly elbow level so you can see and manage food. This is often 36–42 inches from ground to hearth top, but adjust to your body.
Insulate under the hearth. Many first-time builders skip this and lose heat downward, forcing hotter fires that drive thermal stress. Common options:
- Perlite/vermiculite and clay slip mix (lightweight insulating slab).
- Glass bottles set in sand or clay slip, topped by an insulating mix.
- Pumice or scoria mixed with clay slip.
- High-temp board insulation (if available).
On top of insulation, lay the hearth. Firebrick (dry-laid, not mortared tightly) is ideal for a smooth, heat-tolerant cooking surface. Level each firebrick carefully with a sand/clay screed. Tight thermal contact here improves baking performance and reduces hot spots that can cause stress in the dome later.
Edge detailing and drip management. If your oven is outdoors without full roofing, extend a hearth bullnose or add a small drip edge to keep water from sneaking under the bricks and soaking insulation. Remember: moisture management equals crack prevention, because wet/dry cycles magnify dimensional changes in earthen materials.
Protect the base during building. Keep a tarp handy to cover fresh layers if rain threatens, and avoid splash-back from the ground by laying mulch or boards around the work area. Clean transitions and attention to leveling at this stage pay off with even stresses and fewer cracks above.
Forming the hearth, doorway, and dome geometry for structural success
With the base ready, turn to the oven’s structural core: the hearth, the entry, and the dome. Geometry is your ally in building a strong shell that won’t slump or split.
Hearth layout. Dry-fit firebricks tightly with staggered joints where possible. Use a straightedge and level to make the surface flawless. A lumpy hearth encourages uneven thermal expansion and can crack the thermal mass shell. Keep a very thin sand/clay leveling layer under the bricks; avoid thick bedding that could compress or shrink.
Doorway and arch. Build a robust entry arch before the dome. Use a plywood arch form or brick arch template. The arch should key into the dome with staggered joints, not a single cold joint, to prevent a crack line where the entry meets the shell. Maintain the 63% rule for door height relative to dome height to balance draft and heat retention. A solid lintel or arch reduces stress concentrations that otherwise radiate into the dome and produce vertical fissures.
Sand form for the dome. To create a consistent internal shape, mound slightly damp sand into a compact dome over the hearth, to your planned interior height and radius. Cover it with damp newspaper or burlap so the clay/sand shell won’t stick. The sand form ensures consistent thickness and smooth transitions—both are important for even heating and fewer stress points.
Chimney or flue placement. Traditional retained-heat ovens exhaust smoke through the door during firing, then retain heat with the door closed. For continuous fire cooking or improved draft, some builders add a small flue just in front of the door. If you include a flue, ensure it’s structurally independent from the dome (with a slip joint or separate support) so differential expansion doesn’t telegraph cracks into the shell.
Wall thickness targets. The thermal mass shell is typically 3–4 inches thick (about 7–10 cm) for a 24–30 inch interior oven. Thicker walls store more heat but require longer firing and increase risk of uneven drying if rushed. Apply a consistent thickness by marking reference points around the base. Inconsistent thickness creates hot and cold zones and uneven expansion, leading to stress fractures.
Work clean and methodical. Use a simple gauge (a stick cut to desired shell thickness) to check as you go. Gently compress the outer surface with your hands or a wooden paddle to knit the mix and drive out voids. Voids become weak points and crack starters.
Mixing and layering to build an earthen oven without cracks
This is where technique makes the difference between hairlines that stabilize and deep cracks that fail. Follow these best practices as you apply the thermal mass layer:
Batch consistency is king. Prepare multiple small test pucks to confirm your ratio before you scale up. When you mix for the shell, maintain the same moisture and proportions throughout. If you change sand gradation or moisture halfway through, the shell will shrink unevenly.
Apply in lifts. Place the clay/sand mix in 2–3 inch lifts around the dome rather than slapping on thick lumps. Work in courses from the base upward, always compressing into the previous lift. This reduces cold joints and helps fibers (if used) bridge micro-cracks.
Score and key joints. Wherever a new batch meets an old surface that has stiffened, score the interface with a serrated trowel or fingers to create mechanical keying. Moistening the older surface lightly can help—never saturate it. A dry–wet interface can debond and crack.
Control moisture content. The mix should hold its shape when sculpted, with a satiny sheen but not slimy wet. If your thumbprint slowly springs back rather than smearing or crumbling, you’re close. If the shell slumps during application, you likely have too much water—add sand/mix and re-compact.
Fiber wisely. Many builders omit straw in the inner thermal mass for a denser, smoother surface and use fiber primarily in the insulation and outer coats. If your soil is very clay-rich, tiny amounts of chopped straw or fine fibers can help limit crack propagation—but too much can reduce thermal mass integrity. Balance is key.
Remove the sand form at the right time. After the thermal mass firms up (often 12–24 hours depending on weather), gently dig out the sand form through the doorway. If you remove it too soon, the dome can slump; too late, and trapped moisture causes slow drying and surface cracking. When you remove the sand, leave the newspaper/burlap if it’s stuck; it will burn off harmlessly later.
Smooth and compress. Burnish the inner surface with a damp sponge or smooth stone to compress fines and reduce dusting. A smoother interior heats evenly and resists spalling. Outside, use a wooden paddle to consolidate the surface and create a lightly textured tooth for the insulation layer.
Now is a great time to imagine your first meals. If you want time-tested, off-grid-friendly recipes that shine in retained-heat ovens, explore The Lost SuperFoods. It’s a practical way to plan what you’ll cook once your oven is hot and ready.
Drying, curing fires, and first bakes to avoid failures
Drying strategy is the single biggest factor in preventing cracks. Clay shrinks as it loses water; the slower and more evenly it dries, the less stress builds in the shell.
Initial air-dry. After the thermal mass layer is complete, let it air-dry under shade with good airflow for several days, even a week or more in humid climates. Shield the oven from direct sun and wind that can dry the outer surface rapidly while the interior stays wet—this gradient invites surface cracking. Use a breathable tarp or shade cloth to moderate conditions.
Add insulation after initial set. Once the thermal mass is leather-hard (firm but not fully dry), apply your insulation layer: clay slip mixed with perlite, vermiculite, pumice, or sawdust. Aim for 3–4 inches of insulation. Keep this layer slightly moist as it cures; do not trap water between layers with impermeable coverings.
Outer shell or scratch coat. A fibered clay/sand coat (or lime-based render) over the insulation locks it in place and provides shape. Keep it breathable at this stage. Avoid cement; it’s too rigid and traps moisture, which can drive cracks when heated.
Curing fires: low and slow. Start with small, gentle fires:
- Day 1–2: Candle fires—tiny flames with the door open to draw moisture out. Keep your hand on the dome; it should be warm, not hot.
- Day 3–4: Small kindling fires, 30–60 minutes, shifting around the hearth to dry evenly.
- Day 5–7: Gradually larger fires. Watch for steam: that’s moisture leaving. Any hissing signals pockets of water—slow down.
Never try to bake before the oven is fully dry. Early high heat turns residual moisture into steam that can spall the surface or open deep cracks. As you progress, you’ll see the dome discolor, then turn pale as it dries and heat bleaches the clay.
First bakes. Start with breads and casseroles at moderate temperatures. Avoid high-fat foods that can soak into a damp shell. As performance stabilizes, you can explore pizzas at higher temps and sequenced cooking from hot to warm (pizza → bread → roasts → slow stews → drying).
If a hairline crack appears, don’t panic. Many stabilize on their own as drying completes. Widen only if necessary and fill with a matching clay/sand slurry, then burnish and cure gently again. Deep, traveling cracks usually signal uneven drying or a weak base—address the cause, not just the symptom.
Weatherproof finishes, roof options, and long-term maintenance
Once the oven is fully cured and performing, protect it from the elements while maintaining breathability. This is your long-term insurance against failures.
Breathable finishes. Lime-based finishes excel because they shed water yet allow vapor to escape:
- Lime plaster system: scratch, brown, and finish coats over a well-keyed underlayer. Each coat cures slowly; protect from sun and rain as it carbonates.
- Limewash: a thin, re-coatable finish that refreshes annually and self-heals micro-cracks over time.
- Earthen plasters with a final aliz (clay slip with natural oils) can work under a roof but are less water-resistant than lime.
Avoid acrylic paints or dense cement renders. They trap moisture and concentrate stress, often causing blistering and hidden damage.
Build a roof if you can. A simple shed roof (metal, shingles, or polycarbonate) with generous overhangs and gutters is the best defense. Orient drip lines away from the base, and add a gravel skirt to prevent splash-back. Even a temporary seasonal canopy significantly reduces wet/dry cycling.
Chimney caps and door covers. If you added a flue, cap it to block rain when not in use. A fitted wooden door keeps animals and weather out. Store removable elements under cover.
Seasonal care checklist:
- Before winter: Touch up limewash, check roof fasteners, ensure drainage paths are clear. In freeze-prone climates, keep the oven dry; even high-fired clay can suffer from freeze–thaw expansion.
- During wet spells: Cover the oven with a breathable tarp if not roofed. Avoid firing waterlogged ovens; slow pre-warm if needed.
- After heavy use: Inspect the inner shell for spalling or soot-saturated areas. Brush and patch with matching mixes if needed.
Troubleshooting common cracks and fixes:
- Vertical crack at the door: Often from a weak or poorly keyed arch-to-dome joint. Solution: Rebuild or reinforce the arch, keying it into the dome; fill and paddle the crack blend.
- Spiral or sweeping dome crack: Usually uneven thickness or rapid drying. Solution: Stabilize moisture, rehydrate the area lightly, fill with clay/sand slurry, add a thin compression coat, and cure slowly.
- Base-to-dome crack ring: Indicates base movement. Solution: Improve foundation drainage, add shims or rebuild with a better capillary break.
Long-term performance improves with good firing habits. Use well-seasoned wood, start small, and allow the dome to come up to temperature evenly. Avoid thermal shock from sudden roaring fires in a cold, damp oven.
Conclusion
With careful planning, good soil science, and patience in drying, you can build an earthen oven without cracks or failures and enjoy a resilient, high-performance centerpiece for outdoor cooking. Keep the sand content high, water low, layers keyed and compressed, and drying gentle. Protect the oven with breathable finishes and, ideally, a simple roof. The result is an oven that not only bakes superbly but also stands up to seasons of use.
Ready to start building and cooking? Make the process smoother by ensuring clean water is always on hand, lining up tried-and-true recipes for retained-heat cooking, and setting up basic safety prep.
- For dependable water storage that simplifies mixing, cleaning, and curing: SmartWaterBox
- For classic, durable foods that fit perfectly with oven heat cycles: The Lost SuperFoods
- For practical medical guidance on minor burns, smoke exposure, and workshop injuries: Home Doctor
Take your time, respect the material, and your oven will reward you with decades of bread, pizza, roasts, and shared meals.
FAQ
How do I build an earthen oven without cracks in a dry climate?
Shade your build, keep each layer just damp enough, and dry slowly under breathable cover. Increase sand proportion to reduce shrinkage, apply in keyed lifts, and start with tiny curing fires over several days.What’s the best sand-to-clay ratio to avoid failures?
A common starting point is 70–80% sharp sand to 20–30% clay by volume, adjusted for your soil. Test pucks and bricks first; aim for a firm, non-slumping mix that doesn’t craze badly as it dries.Do I need insulation under the hearth?
Yes. Without insulation, heat is lost downward, forcing hotter, longer firings that stress the shell and shorten oven life. Use perlite/vermiculite-clay mixes, pumice, or bottle beds topped with insulation.Are hairline cracks normal?
Tiny hairlines can be normal as the oven completes drying, especially around the entry. Monitor them; many stabilize. Address causes (drying too fast, uneven thickness, base movement) before patching with clay/sand slurry.What finish should I use to weatherproof the oven?
Choose breathable finishes like lime plaster and limewash. Avoid cement and acrylics, which trap moisture. A simple roof is the most effective long-term protection against moisture-related failures.