
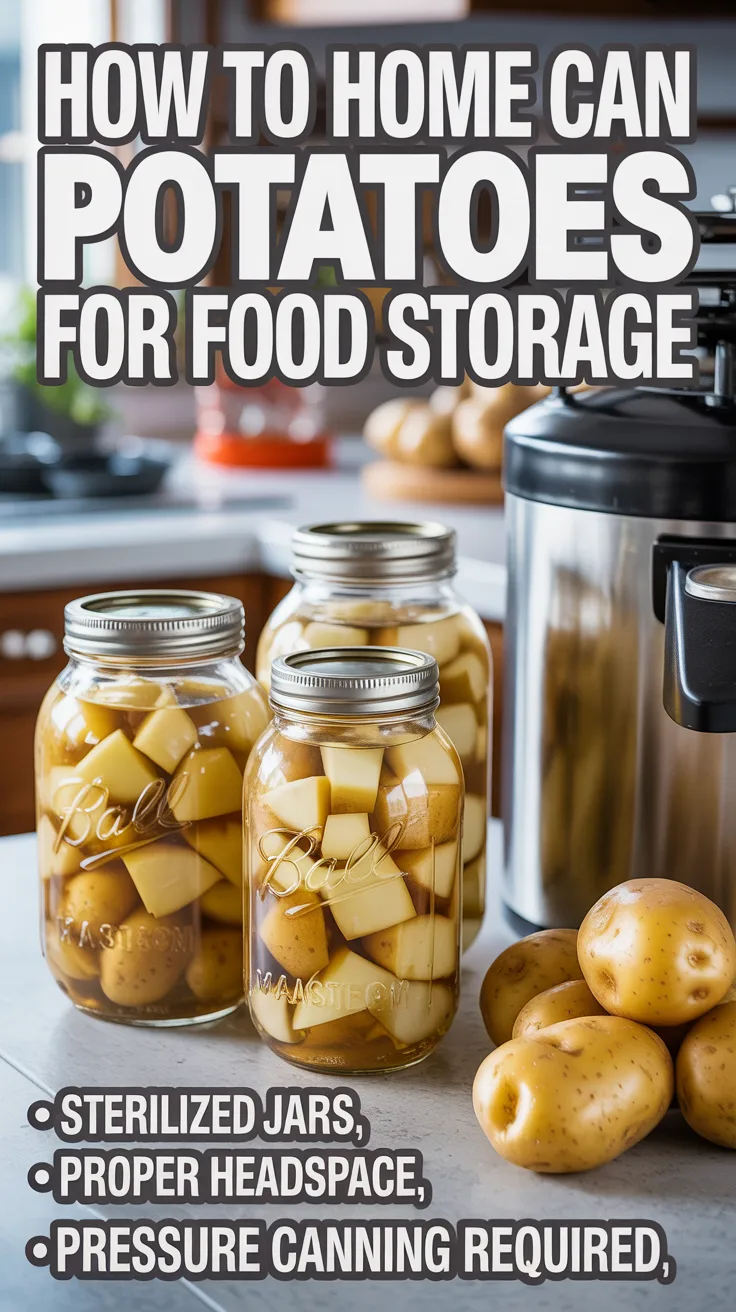
Canning potatoes at home is one of the most satisfying, practical ways to extend your pantry and prepare quick weeknight meals, while also increasing resilience for emergencies. This complete guide explains how to home can potatoes for food storage using safe, modern methods. You’ll learn which potatoes to choose, how to prep and hot-pack them, the correct pressure canning times and pressures, and how to store and use your jars for the best flavor and texture.
If you’re building a long-term pantry beyond potatoes, a practical, step-by-step resource like The Lost SuperFoods can help you diversify shelf-stable recipes and storage strategies.
Table of Contents
Essential safety and equipment for pressure canning potatoes
Potatoes are a low-acid vegetable, which means they must be processed in a pressure canner—never a boiling-water bath—to reach temperatures high enough to destroy botulism spores. Pressure canning is the only USDA-approved method for safely preserving plain potatoes in jars. This guide follows those principles and times so you can can with confidence.
Core equipment:
- Pressure canner: A true pressure canner with a locking lid and either a dial gauge or a weighted gauge. (A pressure cooker is not a pressure canner.)
- Mason jars: Standard-mouth or wide-mouth pint or quart jars. Half-gallons are not safe for potatoes.
- Lids and bands: Use new flat lids each time; bands can be reused if not bent or rusty.
- Jar lifter, canning funnel, bubble remover/headspace tool: These make filling and handling hot jars safer and cleaner.
- Large stockpot: For blanching (parboiling) potatoes and for boiling water used to top off jars.
- Clean towels, vinegar, and a timer.
Food-safety foundations for potatoes:
- Pressure only: Water-bath canning cannot get hot enough for low-acid foods like potatoes.
- Correct headspace: Potatoes require 1 inch of headspace to promote strong seals and minimize siphoning.
- No thickeners or dairy: Never add flour, cornstarch, butter, milk, or cream to jars before canning; these slow heat penetration and risk unsafe results.
- Peeling required: Always peel potatoes before canning. Peels can harbor bacteria, and peeled pieces process more uniformly.
- Size matters: Uniform, small pieces heat more predictably. Whole potatoes must be small (2 inches or less in diameter) to be safe for canning.
Salt is optional. Canning salt (pure, fine-grained) seasons the potatoes without affecting safety. If you choose to add it, use 1/2 teaspoon per pint or 1 teaspoon per quart.
Altitude matters in pressure canning. As elevation increases, water boils at a lower temperature. You must adjust pressure (and sometimes weight) to maintain the correct temperature inside the canner. You will find specific altitude adjustments later in this guide.
Selecting, peeling, and prepping potatoes for canning
Start with firm, mature, fresh potatoes free of sprouting, green spots, or deep blemishes. Avoid spongy or wrinkled potatoes. The variety you choose affects texture after canning:
- Waxy or all-purpose varieties (Yukon Gold, Red Norland, Kennebec, Yellow Finn): These tend to hold shape better in the jar and after reheating. Ideal for soups, skillet breakfasts, and potato salads.
- Russet/Idaho: These can be canned, but they’re starchier and may soften more. They’re good for mashing or casseroles after canning.
- Fingerlings and small baby potatoes: If 2 inches or smaller in diameter, these can be canned whole (after peeling), but ensure size uniformity.
Peeling and cutting:
- Wash potatoes well and peel them completely. Peel removal is a safety and quality requirement.
- For cubed potatoes, cut into roughly 1-inch cubes so heat penetrates evenly. For whole potatoes, ensure none exceed 2 inches in diameter.
- As you peel and cut, place potatoes in a large bowl of cool water to prevent browning. If you want extra anti-browning protection, you can add a small amount of ascorbic acid (per label directions) to the holding water; this is a quality step, not a safety requirement.
Parboiling (blanching):
- Cubed potatoes: Boil for 2 minutes in lightly boiling water. This sets texture, removes surface starch, and helps prevent cloudiness in jars.
- Small whole potatoes (≤2 inches): Boil for 10 minutes to warm them through and improve pack quality.
After parboiling, drain the potatoes and keep them hot until you fill jars (hot-pack method). Meanwhile, bring fresh water to a boil (this will be the liquid you pour over the potatoes in the jars). Hot-pack improves final quality and reduces siphoning and trapped air.
Inspect for quality:
- Trim away any green or sprouted areas entirely. Green indicates solanine, which can taste bitter.
- Discard any potatoes with internal black spots, moldy odors, or mushy textures.
By favoring small, uniform, peeled pieces and parboiling, you set yourself up for consistent texture and safe, even heating during pressure canning.
Jars, lids, and a smooth canning workflow
Setting up your workspace before you start makes the process safer and more enjoyable. Give yourself plenty of counter space near the stove, and set out a clean towel for loading and a second towel for resting hot jars.
Jars:
- Wash jars in hot, soapy water and rinse well. They do not need to be sterilized when pressure canning because the processing time will sterilize them; however, they should be clean and kept hot to reduce temperature shock when filling.
- Keep jars hot by submerging in simmering water or placing them in a warm oven (no hotter than 225°F/107°C) until you’re ready to fill. Many canners prefer using the canner itself or a spare pot of hot water to hold jars warm.
Lids and bands:
- Follow your lid manufacturer’s directions. Most modern flat lids should be washed and kept at room temperature (not boiled), though some brands still recommend warming. Do not boil lids, as it can damage the sealing compound.
- Bands need only be clean and free from rust or warping.
Canner readiness:
- Add 2 to 3 inches of hot water to your pressure canner. Some models call for a specific amount—follow your manual. Adding a tablespoon of white vinegar to the canner water can reduce mineral film on jars.
- Place the empty rack in the bottom of the canner to keep jars off direct heat, preventing breakage.
- Preheat the canner water to a gentle simmer, not a rolling boil. This keeps temperature transitions gentle when you load the hot-packed jars.
Organize a filling station:
- Line up hot jars, a canning funnel, a ladle, a bubble remover (or thin spatula), a damp cloth or paper towel dipped in vinegar for wiping rims, and your hot parboiled potatoes and boiling water.
- Keep a headspace tool nearby so you can quickly verify the required 1-inch headspace.
Good workflow cuts down on cooling delays that can lead to poor seals or siphoning. Keeping jars, food, and canner water hot helps maintain a smooth rhythm from packing to processing.
Step-by-step method for how to home can potatoes for food storage
This hot-pack method is the gold standard for high quality, safely canned potatoes. Work carefully and do not rush.
- Prepare the potatoes
- Peel completely.
- Cut to 1-inch cubes or choose small whole potatoes 2 inches or less in diameter.
- Parboil: 2 minutes for cubes; 10 minutes for small whole. Drain and keep hot.
- Prepare canning liquid
- In a separate pot, bring fresh water to a boil. This will be the liquid you pour over the potatoes in jars. Do not use the parboiling water (it can be too starchy and cloudy, though some canners don’t mind cloudiness).
- Fill hot jars
- Add hot potatoes to each hot jar.
- Optional: Add canning salt—1/2 teaspoon per pint, 1 teaspoon per quart.
- Pour boiling water over the potatoes, leaving 1 inch of headspace.
- Remove air bubbles by sliding a bubble remover or thin spatula around the inside edge of the jar. Adjust headspace if needed by adding more hot water.
- Clean rims and apply lids
- Wipe rims and threads with a cloth dipped in hot water or vinegar to remove any starch film.
- Place lids on the jars and spin bands on fingertip-tight (snug, not cranked down).
- Load the pressure canner
- Place filled jars on the rack in the canner with 2–3 inches of simmering water.
- Secure the canner lid. Leave the vent/weight off for now.
- Vent the canner
- Turn heat to high. When a steady column of steam escapes from the vent, vent for a full 10 minutes to purge air. This step is essential to ensure proper internal temperature.
- Bring to pressure and process
- Place the weight or close the petcock. Bring the canner to the correct pressure for your gauge type and altitude (details in the next section).
- Start timing once proper pressure is reached and stabilized.
- Processing times for potatoes:
- Cubed potatoes: 35 minutes (pints), 40 minutes (quarts).
- Whole small potatoes (≤2 inches): 40 minutes (pints), 45 minutes (quarts).
- Maintain steady pressure; adjust heat as needed.
- Cool the canner naturally
- When time is up, turn off the heat. Do not force-cool the canner or open the vent. Allow pressure to return to zero on its own.
- After the dial reads zero or the weight indicates no pressure, wait a few minutes before removing the weight and opening the lid away from you to avoid steam burns.
- Remove and rest the jars
- Lift jars straight up with a jar lifter and place on a towel, leaving space between jars. Do not tilt jars.
- Let them cool undisturbed for 12–24 hours.
Kitchen mishaps happen. Keeping a practical medical reference like Home Doctor on your shelf can help you handle minor cuts, burns, and foodborne illness basics while you’re canning or cooking—especially valuable if urgent care isn’t immediately accessible.
Processing times, pressure, and altitude adjustments
Processing potatoes safely requires both the correct time and the correct pressure. The times listed here are USDA-aligned and assume clean, properly prepared ingredients and jars.
Base processing times:
- Cubed (peeled) potatoes:
- Pints: 35 minutes
- Quarts: 40 minutes
- Whole small potatoes (peeled, ≤2 inches):
- Pints: 40 minutes
- Quarts: 45 minutes
Headspace:
- Maintain 1 inch headspace for all potato jars.
Pressure settings by gauge and altitude:
- Weighted-gauge pressure canner
- 0–1,000 ft: 10 pounds
- Above 1,000 ft: 15 pounds
- Dial-gauge pressure canner
- 0–2,000 ft: 11 pounds
- 2,001–4,000 ft: 12 pounds
- 4,001–6,000 ft: 13 pounds
- 6,001–8,000 ft: 14 pounds
How to apply this in practice:
- Know your altitude. You can find it through a quick online search of your town or by using a GPS-enabled phone.
- Choose your canner type. If you use a weighted gauge, you’ll likely have a 10-pound or 15-pound weight selection; pick the one for your altitude. Dial-gauge users set the exact PSI.
- Start timing only once your canner is at full, steady pressure. Fluctuations that drop the pressure below target mean you need to bring the pressure back up and restart timing from the beginning for safety.
- Don’t reduce time to “avoid overcooking.” The processing time is necessary for safety; quality depends on correct prep and hot-pack, not cutting time.
Final safety notes:
- Never can mashed or pureed potatoes as plain jars; density is too high for safe heat penetration.
- Don’t add fats, thickening agents, or dairy products before canning.
- Always peel potatoes for canning.
- Consult your canner’s instruction manual for model-specific steps (e.g., water volume, gasket care), and your local cooperative extension for any region-specific updates.
Cooling, sealing, labeling, and pantry storage best practices
Once your jars are processed and removed to cool, patience pays off. Letting jars rest undisturbed for 12–24 hours allows seals to form and the contents to settle.
What to expect as jars cool:
- Sealing sounds: You may hear the satisfying “ping” as lids invert and seal.
- Starchiness and water clarity: The liquid in potato jars may appear cloudy due to natural starch; this is normal, especially if you used parboiling water. Using fresh boiling water for fill reduces cloudiness but is optional.
- Siphoning: Some jars may lose a bit of liquid if the pressure fluctuated or the jars were overfilled. As long as there’s still enough liquid to cover most of the potatoes and the seal is strong, the food is generally safe. Do not open sealed jars just to top off liquid.
Next-day checks:
- Remove bands, wash jars: Take off screw bands, wipe jars with warm water and a little vinegar to remove residue, and dry thoroughly.
- Test seals: Lids should be concave and firmly attached. Lift each jar by the lid edge very gently with your fingertips; a properly sealed lid will hold.
- Reprocess or refrigerate? If a jar failed to seal, you can refrigerate and use within a few days, or reheat, repack with a new lid, and reprocess within 24 hours. Reprocessing can soften texture somewhat.
Labeling:
- Mark each jar with contents (e.g., “Potatoes, cubed”), processing style (hot-pack), and date. Accurate labels are the backbone of a rotating pantry.
Storage:
- Store sealed jars in a cool (50–70°F / 10–21°C), dark, dry place away from direct sunlight and temperature swings.
- Remove bands for storage to prevent rust and to make failed seals more noticeable.
- Shelf life: For peak quality, use within 12–18 months. Properly canned, sealed jars remain safe longer, but texture and flavor are best within that window.
When to discard:
- Toss any jars with bulging lids, leaking, spurting on opening, off odors, mold, or unusual color changes not attributable to normal starchiness. Never taste from a suspect jar.
- If spoilage is suspected (e.g., possible botulism), wear gloves and dispose of contents safely. Clean surfaces with a dilute bleach solution per public health guidance.
Everyday uses for home-canned potatoes and emergency readiness
Home-canned potatoes are a time-saver and a staple in both everyday cooking and emergency meal planning. Because they’re already cooked through, they reheat quickly and absorb flavor beautifully.
Everyday meal ideas:
- Skillet breakfasts: Drain, pat dry, and crisp in a bit of oil with onions and peppers for quick hash browns. Season with paprika, garlic, and pepper.
- Soups and stews: Add drained cubed potatoes during the last 10–15 minutes of simmering; they’ll finish heating without breaking down.
- Casseroles and oven bakes: Layer drained potatoes with green beans, shredded chicken, and a light sauce; bake until bubbly.
- Smashed potatoes: Warm, drain, then lightly mash with olive oil and herbs for a fast side dish.
- Potato salads: Waxy varieties hold shape well; drain thoroughly and toss with a vinegar-based dressing while still warm, then chill before adding mayo (if using).
Emergency readiness:
- Fuel-efficient cooking: Since potatoes are fully cooked, reheating takes minimal fuel—ideal during outages.
- Flexible nutrition: Combine with shelf-stable proteins (canned fish or beans) and pantry vegetables for complete meals.
- Quick calories: Potatoes provide filling carbohydrates that pair well with stored fats and proteins.
Flavor tips:
- Season after opening, not in the jar. Add spices, butter, dairy, or thickened sauces at serving time for best texture and safety.
- Rinse if desired. If you prefer less starch, gently rinse drained potatoes before using.
If you want a field-tested library of shelf-stable recipes and preservation ideas to round out your pantry, explore The Lost SuperFoods. It complements your canned potatoes with diverse, durable meal options.
Preparedness resources to deepen your food storage skills
Building a resilient pantry is about more than jars on a shelf—it’s knowing how to put them to work in nourishing, reliable meals and staying calm and capable when minor setbacks happen.
- For a practical, broad collection of shelf-stable foods, recipes, and techniques that pair well with canned staples, consider The Lost SuperFoods.
- For confident self-reliance in the kitchen and beyond, including managing small injuries or understanding foodborne illness symptoms, a handbook like Home Doctor is a helpful addition to your preparedness shelf.
Troubleshooting and pro tips for best results
Even experienced canners sometimes face cloudy liquid or minor siphoning. These tips minimize issues and protect quality.
- Minimize cloudiness: Parboil potatoes and use fresh boiling water to fill jars rather than the parboil water. A splash of vinegar in the canner water also reduces mineral film on jar exteriors.
- Reduce siphoning: Use proper headspace, avoid rapid temperature swings, and allow a full 10-minute vent. Keep pressure steady—big fluctuations push liquid out of jars.
- Prevent jar breakage: Avoid thermal shock by keeping jars hot and loading them into hot canner water. Don’t set hot jars on a cold surface; use a towel-lined counter.
- Keep pieces uniform: Even size equals even heating and better texture. Overly large whole potatoes are not safe; cut them down or choose small ones.
- Stick to plain potatoes: Don’t can mixed thickeners, butter, meats, or dairy in the same jar as your potatoes. Combine after opening for meals.
- Rotate stock: Practice FIFO (first in, first out). Place new jars at the back and move older jars forward so you consistently use the oldest jars first.
With a little attention to detail, you’ll produce beautiful, shelf-stable potatoes that serve both weeknight meals and long-term storage goals.
Conclusion
Mastering how to home can potatoes for food storage is a cornerstone skill for a well-managed pantry and practical preparedness. By selecting the right potatoes, peeling and parboiling, hot-packing into clean jars, and processing at the correct pressure and time for your altitude, you’ll create safe, versatile jars that simplify meals and strengthen resilience. Label, store in a cool, dark place, and rotate your stock for best quality. With each batch, you’ll gain confidence—and a pantry that reliably delivers comfort and nutrition whenever you need it.
FAQ
What is the safest method for how to home can potatoes for food storage?
Pressure canning is the only safe, approved method for canning plain potatoes. Use a pressure canner, hot-pack peeled potatoes, and process for the correct time and pressure adjusted for your altitude.Can I can mashed potatoes or potato soup?
Do not can mashed or pureed potatoes or thickened soups at home. Potato density and added thickeners prevent safe heat penetration. Can plain, peeled cubes or small whole potatoes, then mash or make soup after opening.Do I have to peel potatoes before canning?
Yes. Peeling is required for safety and quality. Peels can harbor bacteria and inhibit uniform heating. Trim away any green or sprouted areas as well.Why is my jar liquid cloudy?
Potatoes release starch, which can cause cloudiness—especially if you used the parboil water for filling. It’s usually a cosmetic issue. Using fresh boiling water to fill and parboiling cubes for 2 minutes helps reduce clouding.How long do home-canned potatoes last in storage?
For best quality, use within 12–18 months. Properly sealed and stored jars remain safe longer, but flavor and texture are optimal within that window. Discard any jars with failed seals, leaks, spurting, off odors, or bulging lids.Can I raw-pack potatoes instead of hot-packing?
Hot-pack (parboil first) is strongly recommended for better quality, less siphoning, and more consistent heating. Raw-pack potatoes often trap air and result in poorer texture.What pressure do I use if I live above 1,000 feet?
With a weighted-gauge canner, use 15 pounds above 1,000 feet. With a dial-gauge canner, use 12 pounds at 2,001–4,000 ft, 13 pounds at 4,001–6,000 ft, and 14 pounds at 6,001–8,000 ft. Maintain pressure steadily and start timing only when you’re at full pressure.