
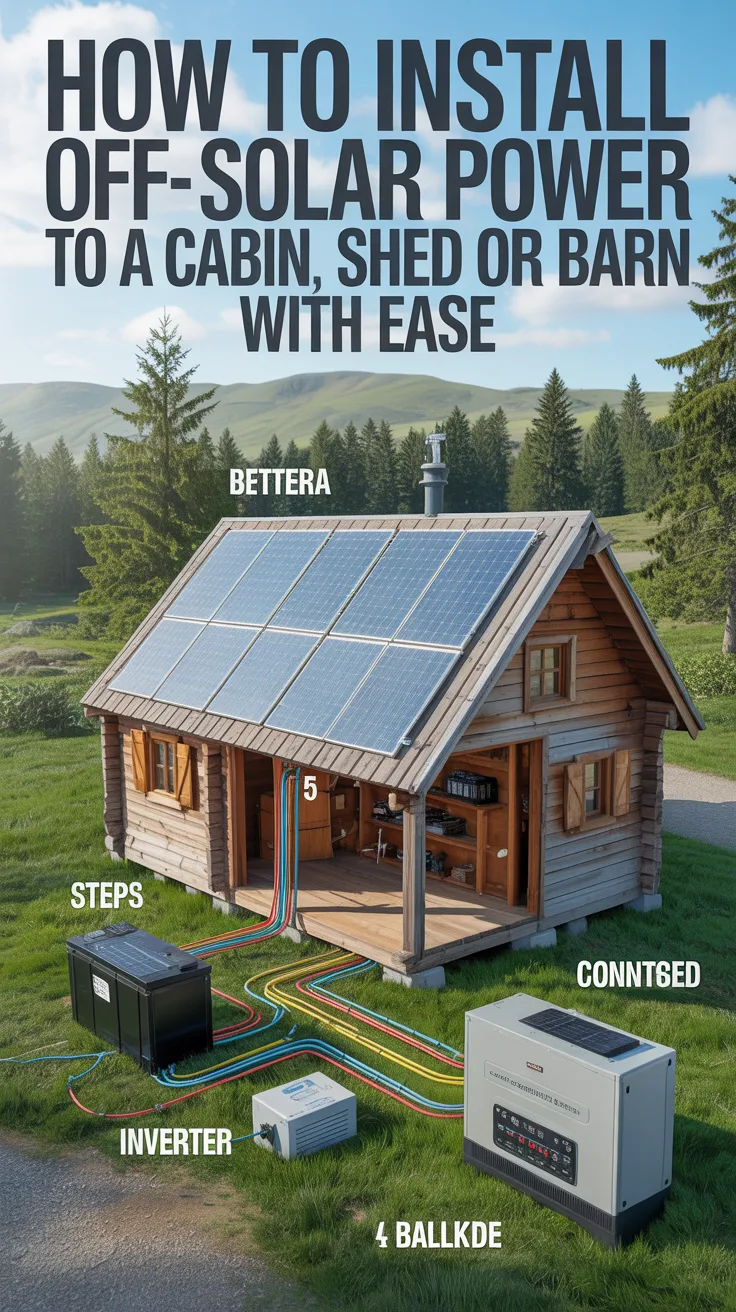
Building a reliable off-grid solar system for a small structure doesn’t have to be intimidating. With a clear plan, a few essential calculations, and safe wiring practices, you can install dependable power for lighting, tools, refrigeration, pumps, or remote work. This guide breaks down how to install off-grid solar power to a cabin, shed or barn with ease, from load planning and component selection to safe mounting, wiring, and commissioning.
If you’re crafting a complete off-grid setup, consider water security alongside electricity. A simple system like SmartWaterBox can help you think through practical, resilient water solutions to complement your power build.
Table of Contents
Clarify Your Energy Goal And Right-Size The System
Start with the end in mind. Decide exactly what your cabin, shed, or barn needs to power, how often, and for how long. The outcome is a right-sized system that runs comfortably without overspending or overcomplicating.
- Make a load list: Every device, its watts, and daily hours of use. Include duty cycles for fridges or freezers (e.g., 150 W running, 30–40% duty cycle).
- Estimate daily energy: Sum watt-hours (Wh). Example: LED lights (30 W × 5 h = 150 Wh), laptop (60 W × 4 h = 240 Wh), DC fridge (50 W × 10 h × 35% duty = 175 Wh), water pump (500 W × 0.5 h = 250 Wh). Total ≈ 815 Wh/day.
- Add a 15–25% buffer for inverter losses, wiring, and cloudy days. 815 Wh × 1.25 ≈ 1,020 Wh/day.
Choose your autonomy days—the number of low-sun days your battery bank should carry you. For a minimal cabin, 1–2 days can work; for homestead reliability, plan 2–3 days. Also note peak sun hours for your location: a southern site might average 4–6 hours in summer but only 2–3 in winter. Tilt and orientation matter.
Match system voltage to size and distance.
- 12 V is typical for tiny systems (<1 kW) and very short wire runs.
- 24 V handles moderate systems and reduces current, shrinking cable size.
- 48 V suits larger or growing installations, especially if you’ll add more panels or run heavier tools.
Decide on your inverter wave and output. Pure sine wave inverters protect sensitive electronics and motors. If you need 240 V for a deep well pump or large tools, plan for a split-phase inverter or a transformer. Where feasible, consider a DC-first philosophy: DC lighting and DC fridges reduce inverter losses.
Match the installation to the structure’s purpose:
- Cabin: Comfort and reliability focus—lighting, refrigeration, device charging, possibly water pumping and winter loads.
- Shed: Intermittent tool use, lights, chargers—usually a modest system with good surge capacity.
- Barn: Lighting, fans, waterers—spike loads and long wire runs call for higher voltage and robust wiring to limit voltage drop.
A well-defined energy profile sets every downstream choice—panel area, battery capacity, wire size, and budget—so you can install with confidence.
Choose Panels, Batteries, Charge Controller, And Inverter
Now transform your load plan into hardware. Your system has four core blocks: PV array, charge controller, battery bank, and inverter. Tuning each one to your goals ensures efficiency and long life.
Solar panels
- Monocrystalline modules provide high efficiency and compact footprint—great for small roofs on sheds and cabins.
- Ground mounts make cleaning easier and often allow optimal tilt; roof mounts save space and wiring distance if your building is unshaded.
Battery bank
- Lithium iron phosphate (LiFePO4) batteries are compact, long-lived, and tolerate deeper cycling. They prefer above-freezing charging temperatures and come with built-in battery management systems (BMS) in many pre-made packs.
- Flooded or sealed lead-acid batteries have lower upfront costs but need more maintenance and weigh more; flooded cells require ventilation and periodic equalization.
Size your bank in watt-hours (Wh). Example: 1,020 Wh/day × 2 days autonomy = ~2,040 Wh. For LiFePO4 (usable ~90%): 2,040 / 0.9 ≈ 2,267 Wh. For a 24 V system, that’s roughly 24 V × 100 Ah = 2,400 Wh—one 24 V 100 Ah battery or two 12 V 100 Ah batteries in series.
Charge controller
- MPPT (maximum power point tracking) is ideal for variable weather and higher voltage strings; it optimizes power harvest and allows longer wire runs with reduced current.
- PWM is cheaper but less efficient and better for small, matched-voltage arrays.
Select a controller with adequate input voltage and current headroom for your array, plus temperature compensation.
Inverter
- Pure sine wave protects electronics and motors.
- Ensure continuous rating exceeds your typical load and that surge rating covers motor starts (fridge, pump, tools). A 1,000–2,000 W inverter is common for modest cabins; barns with pumps may need more.
- If you expect to integrate a generator, many inverter/chargers include transfer switching and battery charging.
Balance-of-system and expandability
- Overcurrent protection (fuses/breakers), PV combiner, disconnects, busbars, shunt/battery monitor, grounding hardware, and appropriately sized wire are essential.
- Consider future add-ons. If you think you’ll add panels or a second battery, choosing a larger MPPT controller or 48 V now can save rework later.
A cohesive parts list, matched to your loads and growth plan, prevents bottlenecks and keeps operating costs low—exactly what you want in a remote structure.
Site And Mounting Plan With Code-Safe Basics
Good mounting and site planning deliver more energy with less hassle. Shading is the enemy; safety and longevity are the goals.
Orientation and tilt
- In the northern hemisphere, face modules true south (adjust for magnetic declination if using a compass). East/west can still work for specific usage patterns (morning tools, evening lighting).
- Tilt to your latitude for annual balance. For winter-heavy use, add 10–15 degrees; for summer cabins, subtract 10–15 degrees.
- Keep rows spaced to avoid self-shading at low sun angles.
Roof vs ground mount
- Roof mounts save space but can be shaded by trees, chimneys, or ridgelines, and may complicate snow removal.
- Ground mounts enable optimal tilt, easy cleaning, and expansion; plan for wind loads, secure foundations, and fencing if livestock roam nearby.
Wire runs and voltage drop
- Keep PV wire runs short; higher system voltage (24/48 V) reduces current and voltage drop, allowing smaller conductors.
- Use UV-rated PV wire and appropriate conduit; avoid sharp bends and abrasion points.
- Pre-plan the “power wall” location (charge controller, inverter, batteries) to centralize protection devices and simplify maintenance.
Safety and code-aware practices
- Batteries: Provide ventilation and physical protection. Keep lithium batteries within recommended temperature ranges; consider heated enclosures in cold climates.
- Overcurrent protection: Every conductor needs a fuse or breaker rated for the wire and load. Use DC-rated breakers/fuses and appropriate interrupt ratings.
- Disconnects: Include a PV array disconnect, battery disconnect, and inverter DC disconnect. Clearly label them.
- Grounding and bonding: Ground the array and equipment per best practices; bond the system to a grounding electrode system. Follow local regulations for neutral-ground bonding at the correct location in the AC system.
- Fire and clearance: Follow manufacturer clearances for inverters and charge controllers. Avoid mounting power electronics in living spaces when possible.
- Permits and inspection: Off-grid does not always mean permit-free. Many jurisdictions require permits for electrical work. If in doubt, consult a qualified electrician to ensure compliance.
Mid-construction checks (squareness of racking, uniform torque on clamps, drip loops on entry points) pay off in decades of trouble-free power. If water independence is part of your site plan, learning about simple, gravity-friendly or pump-assisted systems such as Joseph’s Well can help you coordinate where power and plumbing will meet.
Wire The Array: Series, Parallel, And Overcurrent Protection
Array wiring is where performance and safety converge. Get your series/parallel plan, protection, and connectors right before you lift a single panel onto the rails.
Series vs parallel
- Series adds voltage, keeping current the same. This is ideal for MPPT controllers—higher voltage reduces line losses and lets you run longer distances. Ensure the sum of open-circuit voltages (Voc) in cold conditions stays below the controller’s max input.
- Parallel adds current, keeping voltage the same. Useful for shading resilience and with lower-voltage controllers. Each parallel string may require a fuse.
- Hybrid (series-parallel) combines both for target voltage and current. Example: two modules in series per string, multiple strings in parallel to meet MPPT input and current limits.
Array protection and combiners
- Use a combiner box when you have multiple strings. Each string typically gets a fuse sized at 1.25 × Isc (short-circuit current), following manufacturer tables and applicable codes.
- Install a PV disconnect between the array and controller for safe servicing.
- Label polarity clearly and use touch-safe fuse holders and breakers rated for DC voltage.
Wire, connectors, and conduit
- Use UV-resistant PV wire (e.g., PV-rated 10 AWG) with MC4 or equivalent locking connectors. Keep connections tight and weatherproof.
- Employ strain relief and drip loops at roof penetrations. Seal penetrations with flashing designed for solar or service masts.
- For longer runs, evaluate voltage drop; aim for ≤3% on the DC side. If your current is high, increase conductor size or move the power center closer.
- Keep combiners and junctions accessible. Avoid placing them in areas prone to floods, snow drifts, or direct livestock contact.
Controller and battery integration
- Route array positive through a DC breaker to the charge controller input; array negative directly to the controller negative (unless your system requires a different scheme).
- From the controller to the batteries, place a properly sized fuse or breaker near the battery positive. Keep these cables as short and as heavy as practical.
- Use a battery temperature sensor for accurate charging—especially in cold climates.
A few pro tips: verify polarity at every step with a multimeter; cover panel backs with a blanket to safely reduce voltage during wiring; and never make or break MC4 connections under load. These habits reduce arc risk and protect components.
Assemble The Power Center: Batteries, BMS, Inverter, And Protection
The power center is your system’s heart: a clean backboard or dedicated nook where batteries, controller, inverter, meters, busbars, and safety gear live. Building it neatly makes troubleshooting easy and inspires confidence.
Layout and backboard
- Mount a fire-resistant backboard (e.g., plywood with a noncombustible barrier) on a dry, accessible wall.
- Arrange from left to right or top to bottom: PV disconnect and combiner, charge controller, battery monitor/shunt, busbars, main DC breaker/fuse, inverter/charger, AC subpanel/transfer switch.
- Keep cables short and tidy with labeled heat-shrink. Maintain manufacturer-recommended clearances for airflow.
Battery system
- For LiFePO4, follow manufacturer guidance for series/parallel connections and BMS limits. Keep the pack within stated temperature and charge specs.
- For lead-acid, allow ventilation, protect against spills, and secure batteries from movement. Use battery interconnects of equal length for balanced charging.
Protection and metering
- Install a Class T or appropriate high-interrupt fuse on the battery positive to the inverter. Size it for the inverter’s max current draw and wire rating.
- Use busbars rated for system current; avoid stacking ring terminals directly on battery posts when possible.
- Add a shunt to measure all battery in/out current; connect the battery monitor to track state of charge and catch issues early.
AC integration
- Wire the inverter’s AC output to a small subpanel with dedicated breakers for loads. Keep neutrals and grounds correctly separated or bonded per your inverter’s manual and local code.
- For 240 V loads, use a split-phase inverter or a transformer approved for your model. Confirm surge capacity for well pumps or compressors.
- Decide where the neutral-ground bond lives. In many off-grid systems, the inverter is the bonding point; duplicating bonds can trip GFCIs and cause hazards.
Startup sequence
- With the array still disconnected, power the controller from the batteries first, then power the inverter. Program battery chemistry and charge parameters (absorb, float).
- Only then connect the array via PV disconnect; confirm charging current and voltages on the monitor.
A tidy power center reduces resistance, heat, and headaches. It also elevates safety by making every disconnect, fuse, and measurement point obvious and accessible.
Commission The System And Optimize Performance
Commissioning is your moment of truth—test, verify, and tune so your off-grid solar runs efficiently through seasons and storms.
Pre-flight checklist
- Torque check: Verify all lug and terminal torques match specifications for breakers, busbars, batteries, and inverter.
- Polarity and continuity: Confirm with a multimeter before energizing. Red to red, black to black—no assumptions.
- Labeling: Clearly identify PV disconnects, battery disconnects, and subpanel circuits. Include array string map and test results inside the power center.
Programming and first power
- Program battery chemistry. For LiFePO4, set absorb/float voltages per the manufacturer; disable equalization. For flooded lead-acid, set absorb time and equalize periodically.
- Enable temperature compensation. If you have a remote battery temp sensor, mount it on the battery case.
- Bring the system up in order: battery → controller → inverter → PV array.
- Check real-time data: array voltage/current, battery charge rate, inverter input/output. Record baseline values.
Load testing and fine-tuning
- Apply typical loads and observe inverter watts and battery current. Confirm surges do not trip breakers or sag voltage excessively.
- Inspect voltage drop on long runs to outbuildings; upsize conductors if needed.
- If loads are intermittent (saws, compressors), consider a soft-start device or a larger inverter surge rating.
Maintenance routine
- Quarterly: Clean panels, check wire clamps, inspect for rodent damage, confirm torque on lugs, and test GFCIs.
- Battery care: For lead-acid, check fluid levels and equalize if required. For LiFePO4, avoid charging below freezing unless your battery is rated/heated for it.
- Winter mode: Increase tilt angle for snow shedding; preplan a safe method to clear panels if needed.
Energy-smart habits
- Stagger heavy loads to midday when solar is strongest.
- Favor DC appliances where practical; every inverter conversion adds losses.
- Track state of charge; learn your typical kWh/day and adjust behavior in prolonged cloudy spells.
Document everything—settings, wire sizes, fuse ratings, and a one-line diagram. This living record makes future troubleshooting or expansion simple, and it’s invaluable if you bring in a pro for an upgrade.
Plan For Expansion, Backup, And Off-Grid Comfort
Your needs evolve. A smart off-grid system accommodates growth without starting over.
Expand the array
- If you chose an MPPT controller with headroom, adding another series-parallel string is straightforward. Recalculate input voltage/current versus controller limits before you connect.
- Keep panel models consistent where possible; mixing can reduce performance. If you must mix, group like modules on the same string.
Scale the battery
- Parallel another battery bank only if chemistries and voltages match. Keep cable lengths equal to balance current.
- For large upgrades, consider moving to a higher system voltage (e.g., 24 → 48 V) alongside new components.
Add backup charging
- A small inverter-generator paired with an inverter/charger can top off batteries during extended clouds. Program quiet hours and charge limits.
- DC-coupled vs AC-coupled: DC-coupled (panels → controller → battery) is efficient and simple for small systems; AC-coupled (microinverters or grid-tie inverters feeding an inverter/charger) allows modular expansion but adds complexity.
Adapt to seasonal demands
- Adjust array tilt for winter/summer if you use a ground mount with adjustable racks.
- Temporarily reprogram charge targets or enable generator assist during winter.
Upgrade loads for efficiency
- Swap to high-SEER mini-splits, DC fridges/freezers, and high-efficiency well pumps when you can.
- Add smart relays to run hot water or dehumidifiers only when excess solar is available.
Beyond electricity: water and resilience
- Coordinate solar placement with water systems to reduce pump head and wiring distance.
- For practical water planning, Joseph’s Well explores straightforward approaches to securing reliable water off-grid. Paired with power for pumps, it can make your homestead more self-sufficient.
- If you’re designing a compact, modular water solution, SmartWaterBox can help you think through resilient storage and routing.
Comfort also comes from food and health readiness. Stocking durable staples and having basic medical know-how complements your power independence. Guides like The Lost SuperFoods offer ideas for shelf-stable foods, and Home Doctor provides practical tips for handling common issues when professional help is far away.
Practical Tools, Materials, And A One-Day Build Flow
If you’ve prepped your parts and plan, a small off-grid install can be assembled efficiently. Here’s a practical checklist and a safe, streamlined workflow.
Basic tools
- Cordless drill/driver with nut setters
- Torque wrench and insulated sockets
- Wire strippers, MC4 crimp tool, multimeter
- Conduit bender, fish tape, labeling supplies
- Ladder, fall protection, safety glasses/gloves
Materials snapshot
- Panels, racking, roof or ground hardware
- MPPT controller sized for array
- LiFePO4 or lead-acid battery bank and enclosure
- Pure-sine inverter (or inverter/charger)
- DC fuses/breakers, PV combiner, disconnects
- PV wire (UV-rated), THHN/THWN conductors, conduit
- Busbars, shunt, lugs, adhesive heat-shrink, labels
- Grounding rods/clamps, bonding jumpers
Build flow (high-level)
- Morning: Mount racking and panels
- Snap lines, find rafters or set ground posts, flash penetrations, assemble rails, mount modules with proper torque and mid/end clamps.
- Midday: Run PV home runs and set the power center
- Route PV wires to the combiner and PV disconnect; pull conductors through conduit; mount controller, inverter, busbars, breakers, and shunt.
- Afternoon: Set batteries and wire DC
- Place batteries in the enclosure, wire series/parallel as planned, install main DC fuse/breaker and busbars, connect the charge controller and inverter DC with correct polarity and heavy lugs.
- Late afternoon: Program and commission
- Program battery type/voltages, verify polarity and torque, bring up battery → controller → inverter → PV, test loads, and record baseline data.
Final safety sweep
- Labels visible, conductors supported, no sharp edges on wire runs.
- All penetrations sealed, drip loops present, grounds bonded.
- Working clearance maintained around equipment.
With careful prep, even a first-time installer can assemble a small, code-aware system in a day or weekend. When in doubt on anything electrical, hire a licensed professional for consultation, review, or final termination.
Helpful Off-Grid Resources To Complement Your Solar Build
Round out your off-grid plan with a few curated resources that pair well with small-scale solar:
- Water independence: SmartWaterBox offers a straightforward approach to planning resilient household water systems that match your solar’s capabilities.
- Well and pumping strategies: Joseph’s Well explores practical ideas for securing water access in remote settings.
- Food resilience: The Lost SuperFoods provides guidance on long-lasting pantry options to support off-grid living.
- Health readiness: Home Doctor shares down-to-earth advice for common situations when medical help is distant.
These aren’t required to install solar, but they do help you turn electricity into a complete off-grid lifestyle.
Conclusion
With a clear load plan, well-chosen components, safe mounting, and a careful commissioning process, it’s genuinely achievable to install off-grid solar power to a cabin, shed or barn with ease. Right-size your array and battery for your daily watt-hours, build a tidy power center with correct protection and grounding, and tune the system for the seasons you’ll use it most. The result is simple, dependable independence—energy on your terms, wherever you need it. Layer in water, food, and basic medical readiness, and your small structure becomes a capable, comfortable off-grid retreat.
Frequently Asked Questions
How many solar panels do I need for a small cabin?
Start with your energy budget. If you use about 1 kWh/day and get 4 hours of full sun, you’ll want roughly 300 W of array plus a buffer—often 400–600 W to account for losses and cloudy days. If your winter use is heavier or your site is shaded, increase array size accordingly.
Should I choose 12 V, 24 V, or 48 V for my off-grid system?
Pick the lowest voltage that safely handles your loads and wire lengths. 12 V can work for tiny systems with very short runs. 24 V is a sweet spot for most cabins and small barns. 48 V makes sense for larger arrays, longer distances, and heavier tool or pump loads.
Do I need permits to install off-grid solar on a shed or barn?
Many jurisdictions require electrical permits regardless of grid connection. Check local rules before you start. Using listed equipment, proper overcurrent protection, and correct grounding/bonding will speed inspection. If you’re unsure, hire an electrician for review or final hookup.
What type of batteries are best for off-grid cabins?
LiFePO4 batteries are popular for longevity, low maintenance, and high usable capacity. They prefer above-freezing charging and include a BMS in many prebuilt units. Flooded lead-acid is more affordable initially but requires ventilation and periodic maintenance.
Can off-grid solar run a well pump in a barn?
Yes—size the inverter for the pump’s running and surge watts and ensure your battery and array can cover start-up. For deep wells or 240 V pumps, choose a split-phase inverter or use a compatible transformer. To coordinate power with water planning, resources like Joseph’s Well can be helpful.
How can I install off-grid solar power to a cabin, shed or barn with ease?
Follow a stepwise plan: audit loads, choose voltage and components, plan mounting with minimal shading, wire the array with correct series/parallel strategy and protection, assemble a tidy power center, then commission and test. Keep safety first and consult a pro when needed.