
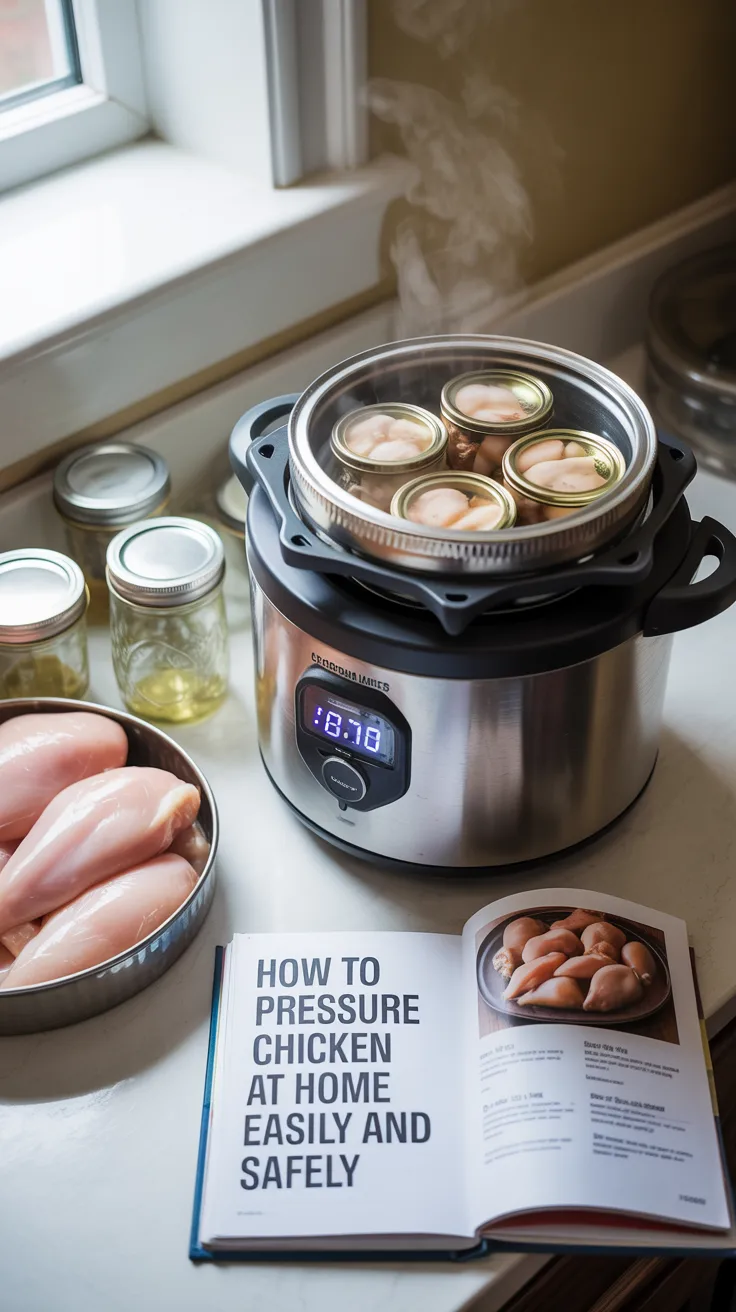
Home-canned chicken turns a busy weeknight into a 10‑minute dinner and gives you dependable protein for emergencies. Learning how to pressure can chicken at home easily and safely takes a few focused steps, the right equipment, and trusted time/pressure guidelines. Once you do a first batch, you’ll see how straightforward it becomes—and why it’s a favorite among homesteaders and meal-preppers.
If you’re building a resilient pantry alongside canning skills, you may also appreciate the practical, no‑frills preparedness ideas in The Lost SuperFoods. It’s a useful companion for pantry planning and old‑school preservation know-how: The Lost SuperFoods.
Table of Contents
What you need and why pressure canning is essential
Canning meat is different from pickles or jam. Because chicken is a low‑acid food, it must be pressure canned to reach botulism-killing temperatures. A boiling water bath cannot get you safely above 212°F/100°C; a pressure canner can. That single difference is the whole reason pressure canning is non‑negotiable for chicken.
Essential tools
- Pressure canner (not a pressure cooker). Choose a model with either a dial gauge or a weighted gauge and follow the manufacturer’s manual closely.
- Mason jars (pints or quarts), new two‑piece lids, and bands
- Jar lifter, canning funnel, bubble remover/headspace tool
- Clean towels, paper towels, white vinegar for wiping rims
- Cutting board and sharp knife
- Large pot for heating broth (hot pack method) and for keeping jars hot
- Optional: food‑safe gloves for handling raw chicken and trimming fat
Ingredients
- Chicken (boneless or bone‑in), trimmed of excess skin and fat
- Canning salt (optional; 1/2 teaspoon per pint or 1 teaspoon per quart)
- Hot broth or water for hot pack; none added for raw pack boneless chunks is also acceptable (poultry releases juices)
Why these steps matter
- The pressure canner creates the high temperature (240–250°F) necessary to eliminate Clostridium botulinum spores in low‑acid foods like poultry.
- Clean jars and proper headspace help ensure a strong vacuum seal.
- Trimming skin and excess fat reduces siphoning and floating fat, which can compromise seals.
Terminology you’ll see as you learn
- Raw pack: Packing raw meat into hot jars. For chicken pieces and chunks, you often do not add liquid because meat releases juice; for some hot pack styles you will add hot broth or water. Both are safe if following approved times.
- Hot pack: Preheating meat and adding hot liquid to the jars. This typically yields a more compact fill with less floating meat.
Choose, prep, and season chicken for best results
Start with fresh, high‑quality chicken. If using frozen chicken, thaw fully in the refrigerator before canning. Both boneless and bone‑in cuts are safe to can; boneless chunks are the easiest to pack and use later, while bone‑in pieces give extra flavor to the liquid.
Selecting cuts
- Boneless breast or thigh meat: Easy to pack into jars and to use later in soups, casseroles, tacos, and salads.
- Bone‑in pieces: Drumsticks, thighs, or whole pieces cut at joints can be canned; remove most skin and large fat deposits to minimize siphoning and improve shelf stability.
Trimming and cutting
- Remove skin and large areas of fat. Skin adds grease to the jar and can interfere with sealing.
- Cut boneless meat into 1‑ to 2‑inch chunks for even packing.
- For bone‑in pieces, keep them manageable in size so they fit with 1 inch headspace.
Seasoning safely
- Salt is optional; use canning salt to prevent cloudiness.
- Dried herbs and spices are fine in light amounts. Good choices include a pinch of dried thyme, rosemary, garlic powder, onion powder, paprika, or peppercorns.
- Avoid thickeners (flour, cornstarch), dairy, and oils in the jar. These interfere with heat transfer and sealing.
- For hot pack, a light unsalted chicken broth enhances flavor.
Jar prep and cleanliness
- Wash jars, lids, and bands in hot, soapy water; rinse well.
- Keep jars hot (in a 180°F water bath or a 200°F oven) until you fill them so sudden temperature changes don’t crack glass.
- Lids do not require boiling; follow the lid maker’s instructions (often “warm, not boil”).
Hot vs. raw pack
- Raw pack yields a looser fill initially (meat will shrink and release liquid during processing), and often requires no added liquid for boneless chunks.
- Hot pack preheats the meat and uses hot broth or water, giving less air in jars and generally less floating. It can produce slightly better texture.
Steps: How to Pressure Can Chicken at Home Easily and Safely
Below is a straightforward workflow you can follow from start to finish. Always cross‑check jar sizes, pack style, and altitude in your canner manual and current USDA guidelines.
- Stage your workspace
- Lay out clean towels, hot jars, canning funnel, ladle, bubble remover, and lids/bands.
- Heat a small saucepan of water to warm lids (if required by your brand).
- For hot pack, keep broth simmering. For raw pack, you’ll fill with meat directly.
- Prepare the pressure canner
- Add the manufacturer‑recommended amount of hot water (often 2–3 inches) to the canner.
- Add 1–2 tablespoons of white vinegar to prevent mineral film on jars if you have hard water.
- Preheat canner water to around 180°F. Keep it hot but not boiling.
- Pack the jars
- For raw pack boneless chunks: Pack raw chicken tightly into hot jars, leaving 1 inch headspace. Adding liquid is optional; meat will release its own juices.
- For raw pack bone‑in: Pack pieces to 1 inch headspace. Do not force pieces; avoid over‑packing.
- For hot pack: Preheat chicken until just cooked through or lightly browned. Pack into jars and cover with hot broth, maintaining 1 inch headspace.
- Add seasonings
- Add canning salt if desired: 1/2 teaspoon per pint, 1 teaspoon per quart.
- Optionally add a pinch of dried herbs or a few peppercorns.
- Remove bubbles and set headspace
- Slide a bubble remover along the jar sides to release trapped air.
- Adjust headspace back to a true 1 inch with more hot broth (hot pack) or by removing a bit of meat (raw pack).
- Clean rims and lid
- Wipe jar rims with a paper towel dipped in white vinegar to remove grease.
- Place lid on center; apply band finger‑tight (snug, not cranked down).
- Load the canner and vent
- Use a jar lifter to lower jars into the canner; ensure they sit on a rack.
- Lock the lid and heat on high until a steady column of steam vents from the open vent for 10 full minutes. Venting purges air so the canner reaches true sterilizing temperature.
- Bring to pressure and process
- Apply the weight or close petcock. Bring to the target pressure for your altitude (see guidance below).
- When pressure stabilizes, start timing. Keep pressure steady—avoid big swings.
- Cool down and remove jars
- When time is up, turn off heat. Let pressure return to zero naturally.
- Wait an additional 10 minutes before removing the lid away from you to avoid steam burns.
- Using the jar lifter, place jars on a towel in a draft‑free spot. Do not tip jars.
- Rest, check seals, and store
- Let jars cool 12–24 hours untouched.
- Remove bands, check seals (lids should be concave and firmly attached), wash jars, label, and store in a cool, dark place.
Pressure and time guidelines you can trust
Processing times depend on jar size, whether the chicken is boneless or bone‑in, and whether you use raw pack or hot pack. Always consult your pressure canner manual and the latest USDA Complete Guide to Home Canning for exact tables. The following reflects commonly used, tested guidance for chicken:
Typical pressure guidelines
- Weighted‑gauge canner: 10 pounds pressure at 0–1,000 feet; 15 pounds above 1,000 feet.
- Dial‑gauge canner: 11 pounds at 0–2,000 feet; 12 pounds at 2,001–4,000 feet; 13 pounds at 4,001–6,000 feet; 14 pounds at 6,001–8,000 feet.
Typical time guidelines for chicken (verify with current official tables)
- Boneless chunks (raw or hot pack): Pints 75 minutes; Quarts 90 minutes.
- Bone‑in pieces (raw or hot pack): Pints 65 minutes; Quarts 75 minutes.
Headspace
- Maintain a consistent 1 inch headspace for poultry.
Salt and liquid notes
- Salt is for flavor only. If raw packing boneless chicken, you do not need to add liquid; the chicken will release juices during processing. For hot pack, cover meat with hot broth or water.
Why steady pressure matters
- Pressure drops can cause under‑processing and siphoning. If pressure dips below target at any point, bring the canner back to pressure and restart the timing from the beginning for safety.
Seal check and labeling
- After cooling 12–24 hours, remove bands and test each lid by lifting gently with your fingertips; a sealed lid won’t flex or lift.
- Label with contents and date. For best quality, use within 12–18 months. Properly sealed jars remain safe longer, but quality (texture/flavor) is best within that window.
Raw pack and hot pack compared for flavor, yield, and convenience
Both raw and hot pack are safe when processed correctly, but they give slightly different results. Understanding the trade‑offs helps you choose the best method for your meal plans.
Raw pack advantages
- Fastest prep: No pre‑cooking step.
- Rich, concentrated broth forms naturally during processing.
- Great for boneless thigh or breast chunks.
- Minimal dishes; less stovetop time before canning.
Raw pack considerations
- Meat shrinks during processing, so jars may look “looser” or less full afterward.
- A little more frequent siphoning if fat is not well‑trimmed or if pressure fluctuates.
- Pieces may float more in the jar.
Hot pack advantages
- Tighter fill and less floating; final jars look fuller.
- You can quickly brown or par‑cook with spices, then cover with hot broth for excellent flavor.
- Generally less siphoning because air has already been driven out of the food.
Hot pack considerations
- More prep time and extra dishes.
- You must keep broth and jars hot to maintain safe temperature flow.
Flavoring tips that stay within safe guidelines
- Use dried herbs and spices sparingly; flavors intensify in jars.
- Add a slice of dried lemon or a few peppercorns for brightness.
- Avoid oil‑packed additions or thick sauces. Thicken after opening the jar when cooking the final meal.
Batch planning
- For quick lunches, can pint jars of boneless chunks (perfect portioning).
- For family dinners, quarts are ideal—one jar becomes a pot of soup or enchiladas.
- Mix cuts: A batch of breast meat for salads and a batch of thighs for flavorful stews.
Preventing spoilage and understanding safety, including botulism
Canning meat is extremely safe when you follow tested procedures. The risks come from shortcuts—insufficient pressure, incorrect times, or trying to water‑bath low‑acid foods. A few habits keep your canning safe and stress‑free.
Safety must‑knows
- Pressure can only: Never water‑bath or steam‑can poultry.
- Vent for 10 minutes: This evacuates air so the canner reaches true sterilizing temperatures.
- Hit the correct pressure for your altitude and keep it steady.
- Use current, tested guidelines; avoid “family recipes” that deviate from official times.
Botulism basics
- Clostridium botulinum spores can survive normal boiling temperatures; only pressure canning reaches temperatures high enough to destroy them.
- Signs of possible spoilage: Bulging or leaking lids, spurting liquid when opened, off odors, cloudy liquid not caused by hard water, unusual sediment, or mold. When in doubt, throw it out.
Handling jars after opening
- Store opened jars in the refrigerator and use within 3–4 days.
- Boil home‑canned meats for 10 minutes before tasting if you ever have any doubt about a jar.
If you like having medical self‑reliance resources alongside food safety, The Home Doctor is a practical reference to keep at home. It’s not a canning guide, but it’s handy for general first‑aid, minor emergencies, and when care is delayed: Home Doctor.
Troubleshooting common issues
- Siphoning (lost liquid): Usually caused by pressure swings or removing jars while still boiling inside. Prevent by allowing a full natural cool‑down and keeping pressure steady. As long as the seal is intact and food remains fully above the rim line, jars are safe; quality may be affected.
- Greasy rims leading to seal failure: Wipe rims with vinegar before placing lids; trim fat/skin from chicken.
- Cloudy liquid: Often minerals in water. Use distilled water or a splash of vinegar in the canner to reduce film. If it’s off‑smelling or slimy, discard.
- Buckled lids: Usually overtightening bands or excessively forceful boil inside jar. Apply bands finger‑tight only.
Storage, rotation, and quick meal ideas that make jars disappear
Storing properly sealed jars
- Cool, dark, and dry area is ideal—50–70°F is perfect.
- Remove rings before storage to prevent rusting and false seals.
- Stack no more than two high and use flat cardboard between layers to protect lids.
Rotation and labeling
- Label the date and cut (e.g., “Chicken Thighs, Raw Pack, 2026‑02”).
- Use FIFO: first in, first out. Keep the newest jars at the back.
Best‑by versus safe‑to‑use
- For best quality, use within 12–18 months. Properly sealed jars can last longer, but texture and flavor slowly degrade over time.
- Always inspect before opening; if anything looks or smells wrong, discard.
Quick meal ideas
- Creamy chicken and rice soup: Saute onion, carrot, and celery; add jar of chicken with its broth, top with stock, simmer; thicken with a slurry at the end.
- Weeknight tacos: Drain a jar, shred, and season in a skillet with chili powder, cumin, and lime.
- Skillet pot pie: Combine canned chicken with mixed veggies and stock; thicken, top with biscuits, and bake.
- Chicken salad: Drain and lightly press to remove excess liquid; mix with mayo, celery, and herbs.
Stretch the broth
- The liquid in the jar is a flavorful base. Use it in grains, soups, or sauces.
- If you hot‑packed with broth, note the salt level so final dishes don’t end up too salty.
Pantry planning and scaling up for busy weeks and emergencies
Once you know how to pressure can chicken at home easily and safely, scaling becomes a simple formula: a focused prep day turns into months of ready‑made protein. Whether you’re cooking for a family or building a resilient pantry, a little planning keeps it effortless.
Batch math
- Family of four, two chicken meals per week: Aim for 8–10 quarts per month (or 16–20 pints) to keep a rolling 3‑month buffer.
- Solo or duo households: Pints are perfect; plan for 8–12 pints per month if you eat chicken 2–3 times weekly.
Shopping and prep rhythm
- Buy whole birds on sale, break down into cuts, and can a mix of boneless chunks and bone‑in pieces for variety.
- Keep a “canning box” with all tools so you can set up quickly.
Water and grid‑down considerations
- Home‑canned chicken is shelf‑stable, but cooking still requires water for side dishes and cleaning. Simple water readiness helps the rest of your kitchen run smoothly during outages.
- For compact, household‑friendly water resilience, look at tools designed to store or filter potable water so canning, cooking, and cleanup remain possible if municipal water is disrupted.
If you’re layering water resilience into your pantry planning, these options may help:
- Aqua Tower: Space‑efficient, family‑oriented water solution for long‑term readiness. See details here: Aqua Tower.
- SmartWaterBox: Modular water storage designed for urban or small‑space homes. Learn more: SmartWaterBox.
Rotation templates
- Keep a simple spreadsheet or pantry notebook with columns for “Batch Date,” “Jar Count,” “Cut,” and “Notes” (e.g., “hot pack with thyme”).
- Plan to can chicken after big sales, then rotate stock each month so nothing ages out past its best quality window.
Recommended tools and resources for confident, stress‑free canning
Success with pressure canning is about process, not perfection. A few well‑chosen references and a repeatable workflow make it genuinely easy.
Your repeatable workflow
- Mise en place: Prep tools, jars, and ingredients first.
- Hot jars, hot broth (for hot pack), tidy station.
- Vent 10 minutes; process with steady pressure.
- Natural cool‑down; check seals the next day.
- Label, store, and enjoy.
Home reference materials
- Keep your pressure canner manual front and center. Every canner has nuances—water volume, lid locking, venting routines—that matter.
- A printed copy of current USDA canning tables for meat gives you time and pressure data at a glance.
Preparedness‑friendly companions
- The Lost SuperFoods: Practical pantry history and preservation ideas you can put to work next canning day. Explore here: The Lost SuperFoods.
- Home Doctor: Sensible at‑home medical reference to pair with any self‑reliance plan. Get it here: Home Doctor.
Mindset for the long haul
- Start small—try four pints your first day. Note what worked, what felt slow, and adjust.
- Within two or three sessions, you’ll have the rhythm that makes canning day relaxed and productive.
Conclusion
You now have the essential methods for how to pressure can chicken at home easily and safely—equipment basics, raw‑versus‑hot pack choices, reliable time and pressure targets, altitude adjustments, and post‑processing checks. Combine a clean workspace with steady pressure and a full natural cool‑down, and the process becomes predictable and easy to repeat.
Once jars are on the shelf, you reap the rewards every week: faster dinners, flavorful broth on demand, and a pantry that cushions against price spikes or outages. Keep your manual and current guidelines handy, trim fat, wipe rims with vinegar, and label jars clearly. That’s the simple, repeatable system that turns canning chicken into one of the most useful kitchen skills you’ll ever learn.
FAQ
Can I add vegetables or thickeners when I pressure can chicken?
It’s best to can chicken by itself or with simple, safe seasonings. Avoid adding vegetables (which can change heat penetration) and never use thickeners like flour or cornstarch inside the jar. Add vegetables and thickeners when you open the jar to cook the final dish.Do I need to sterilize jars before pressure canning chicken?
No. Because processing times exceed 10 minutes, pre‑sterilizing jars isn’t required. Jars must be thoroughly cleaned and kept hot to prevent thermal shock. Lids should be prepared according to the manufacturer’s instructions.What headspace do I use and should I add liquid?
Use 1 inch headspace for poultry. For raw pack boneless chunks, you typically don’t add liquid—chicken releases juices during processing. For hot pack, cover with hot broth or water while maintaining 1 inch headspace. Always verify specifics in current USDA tables.What pressures and times should I use to pressure can chicken safely at home?
Common guidance: weighted gauge at 10 psi (0–1,000 ft) or 15 psi (>1,000 ft); dial gauge at 11–14 psi depending on altitude. For boneless chunks, pints 75 minutes and quarts 90 minutes; for bone‑in pieces, pints 65 minutes and quarts 75 minutes. Always confirm with up‑to‑date, tested sources.How long does home‑canned chicken last and how should I store it?
For best quality, use within 12–18 months. Store sealed jars in a cool, dark place (50–70°F). Remove rings, label with date, and use FIFO rotation. Inspect each jar before opening; when in doubt, throw it out.